
Are you tired of digging through cluttered pantry shelves every time you need something? Imagine opening your pantry and instantly finding exactly what you want, neatly organized and easy to reach.
Building your own pantry storage shelves can turn this dream into reality. Not only will it save you time and frustration, but it will also give your kitchen a clean, fresh look. In this guide, you’ll discover simple steps to create sturdy, stylish shelves tailored to your space and needs.
Ready to transform your pantry and make your life easier? Let’s get started!
Credit: www.hgtv.com
Planning Your Pantry Shelves
Planning your pantry shelves is the first step to creating a neat storage space. Careful thought helps avoid mistakes and wasted materials. It also ensures the shelves fit your space and needs perfectly.
Good planning saves time and money. It makes sure your pantry holds all your items safely and accessibly. Start by understanding the space you have and the type of shelves that suit your pantry best.
Measuring Available Space
Measure the width, height, and depth of your pantry walls. Write down these numbers clearly. Check for any obstacles like pipes or light switches. These can affect shelf placement.
Use a tape measure for accuracy. Measure at several points to catch any irregularities. Note the smallest dimensions to avoid shelves that won’t fit.
Choosing Shelf Materials
Select materials that hold weight well and resist moisture. Wood is strong and looks warm. Metal shelves offer durability and a modern look.
Consider plywood for a budget-friendly option. Solid wood works well for heavy items. Plastic shelves can be easy to clean but might not hold heavy cans.
Think about how the material matches your pantry style. Also, check if the material needs special tools to cut or assemble.
Deciding Shelf Dimensions
Decide how deep and wide each shelf should be. Standard pantry shelves are 12 to 16 inches deep. Make shelves wide enough to hold your largest containers.
Think about the height between shelves. Leave enough room for tall bottles or cereal boxes. Adjustable shelves give flexibility for future changes.
Balance between too many shelves and too few. Crowded shelves make it hard to reach items. Too few shelves waste vertical space.
Gathering Tools And Supplies
Before you start building your pantry storage shelves, it’s crucial to gather all the necessary tools and supplies. Having everything ready will save time and prevent interruptions during the project. It also ensures you work safely and efficiently, avoiding trips to the hardware store mid-build.
Essential Tools Checklist
- Measuring tape:Accuracy is key, so measure twice to avoid mistakes.
- Level:Keep your shelves straight to prevent items from sliding off.
- Power drill:Speeds up screwing and drilling, making the process smoother.
- Screwdriver set:Handy for adjustments and securing hardware.
- Stud finder:Find wall studs to anchor your shelves securely.
- Safety gear:Goggles and gloves protect your eyes and hands during cutting and drilling.
- Saw:A handsaw or circular saw for cutting wood to size.
Do you have all these tools ready? Missing just one can stall your project and cause frustration.
Recommended Hardware
- Wood screws:Choose screws suitable for the wood type and shelf weight.
- Brackets or shelf supports:Select sturdy brackets that can hold your planned load.
- Wood boards:Pick quality boards that fit your pantry dimensions and style.
- Wall anchors:Necessary if you can’t screw directly into studs.
- Sandpaper:Smooth edges and surfaces for a professional finish.
Think about the weight your shelves will hold. Are your brackets and screws strong enough? Choosing the right hardware now prevents future shelf sagging or failure.
Preparing The Workspace
Clear the area and gather all tools before starting. Ensure enough light and space to work safely and comfortably. Organize materials nearby for easy access during assembly.
Preparing the workspace is a key step in building pantry storage shelves. A well-organized space ensures a smooth and efficient building process. You’ll need to focus on two main tasks: clearing the area and marking shelf placement. Each task sets the foundation for sturdy and functional shelves.
Clearing The Pantry Area
Start by removing all items from your pantry. This gives you a clear view of the space. Organize the items into categories. Group similar items together for easy access later. Use boxes or bins to keep things tidy. Check the walls and floor for damage. Repair any cracks or holes for a solid shelf foundation. Clean the area thoroughly. Dust and dirt can interfere with shelf installation.
Marking Shelf Placement
Measure the height, width, and depth of your pantry. Use a measuring tape for accuracy. Decide how many shelves you need. Plan the spacing based on item size. Mark the wall where each shelf will go. Use a pencil for easy adjustments. Ensure the marks are level. A carpenter’s level can help with this. Double-check measurements for accuracy. Proper placement ensures balanced shelves.

Credit: penniesforafortune.com
Cutting And Assembling Shelves
Cutting and assembling shelves is where your pantry storage project starts to take shape. Precision during this phase ensures your shelves fit perfectly and hold up well over time. Let’s break down the essential steps to get your shelves ready and sturdy.
Measuring And Cutting Wood
Start by measuring the space where your shelves will go. Double-check your measurements to avoid costly mistakes—have you ever cut a board only to find it was too short? Use a pencil to mark your cut lines clearly on the wood.
Choose the right type of wood for your pantry shelves—pine is a popular choice because it’s easy to cut and affordable. Use a circular saw or a handsaw for straight, clean cuts. Take your time and cut slowly to maintain control and accuracy.
Sanding And Finishing Edges
After cutting, rough edges can cause splinters or prevent shelves from fitting snugly. Sand all edges with medium-grit sandpaper first, then finish with fine-grit for a smooth touch. This step not only improves safety but also enhances the shelf’s appearance.
You might want to apply a clear sealant or paint after sanding to protect the wood from moisture and stains. Have you considered how a simple finish can extend the life of your shelves? It’s a small effort that pays off in durability.
Assembling Shelf Units
Lay out all your pieces before assembling to ensure everything fits as expected. Use wood glue along the edges where pieces meet for extra strength, then secure them with screws or nails. Clamps can hold parts firmly while the glue dries, making assembly easier.
Check for levelness as you assemble each shelf. Uneven shelves can cause items to slide or fall, which nobody wants in a pantry. Do you have a spirit level handy? It’s a simple tool that makes a big difference during assembly.
Installing Shelf Supports
Installing shelf supports is a crucial part of building sturdy pantry storage shelves. Without strong supports, your shelves might sag or even collapse under the weight of your canned goods and kitchen supplies. Taking the time to properly install these supports ensures your pantry stays organized and safe for years.
Locating Wall Studs
Finding the wall studs is the first essential step. Studs provide the solid backing your shelf supports need to hold weight securely.
You can use a stud finder tool to locate them easily. If you don’t have one, try tapping the wall lightly and listen for a solid sound, which usually indicates a stud.
Mark the stud locations with a pencil at the height where you want the shelves. Are you sure your marks align horizontally? Use a level to double-check before drilling.
Mounting Brackets Securely
Once you have the stud locations, it’s time to attach the brackets. Use screws that are long enough to penetrate the drywall and go deep into the studs for maximum support.
Pre-drill holes to avoid splitting the wood, especially if you are using hardwood studs. Hold the bracket in place and screw it tightly into the stud.
Double-check the bracket is level before fully tightening. An uneven bracket can cause your shelves to tilt, which affects the overall stability.
What weight will your shelves hold? Consider using heavy-duty brackets if you plan to store heavy items like large jars or appliances.
Credit: www.extraspace.com
Mounting Shelves In Place
Mounting your pantry storage shelves securely is crucial to ensure they hold your items safely and last for years. The process involves careful positioning and leveling before you fasten the shelves to the supports. Taking your time here can prevent a lot of future hassle, like shelves that sag or fall.
Positioning And Leveling Shelves
Start by deciding the exact height for each shelf based on what you plan to store. Adjustable shelves offer flexibility, but fixed shelves require precise measurements. Use a tape measure to mark the wall clearly, and double-check the spacing between shelves to fit your tallest items.
Next, use a level to make sure each shelf line is perfectly horizontal. A crooked shelf can cause items to slide off or create uneven weight distribution. If you don’t have a level, a smartphone app can also do the job.
Securing Shelves To Supports
Once your shelves are positioned and level, it’s time to attach them securely. Use sturdy brackets or cleats that can handle the weight of your pantry goods. Always anchor screws into wall studs rather than just drywall to avoid accidents.
Pre-drill holes to prevent the wood from splitting and use a drill or screwdriver to fasten the screws tightly. Don’t forget to test the stability by applying some pressure before loading the shelves. Would you trust your pantry shelves without giving them this crucial check?
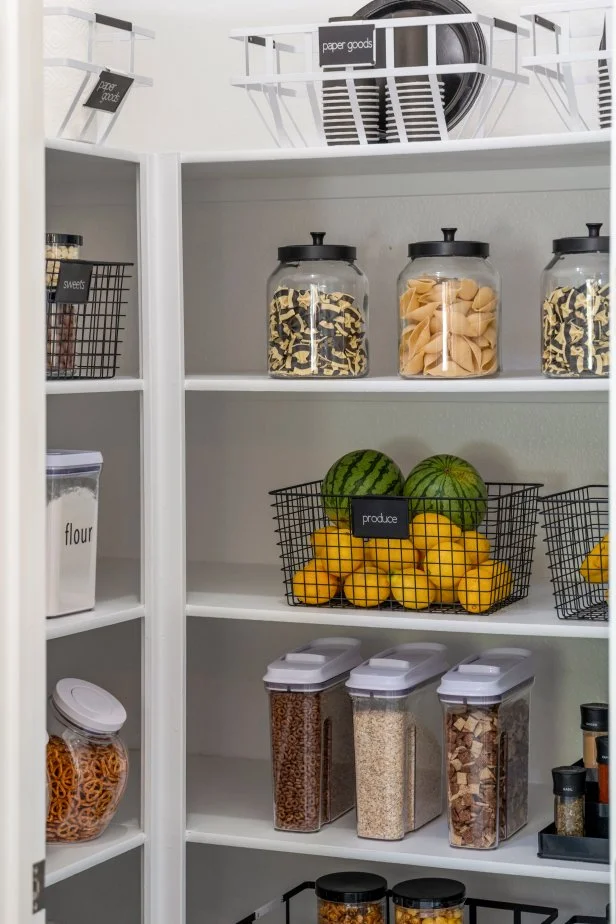
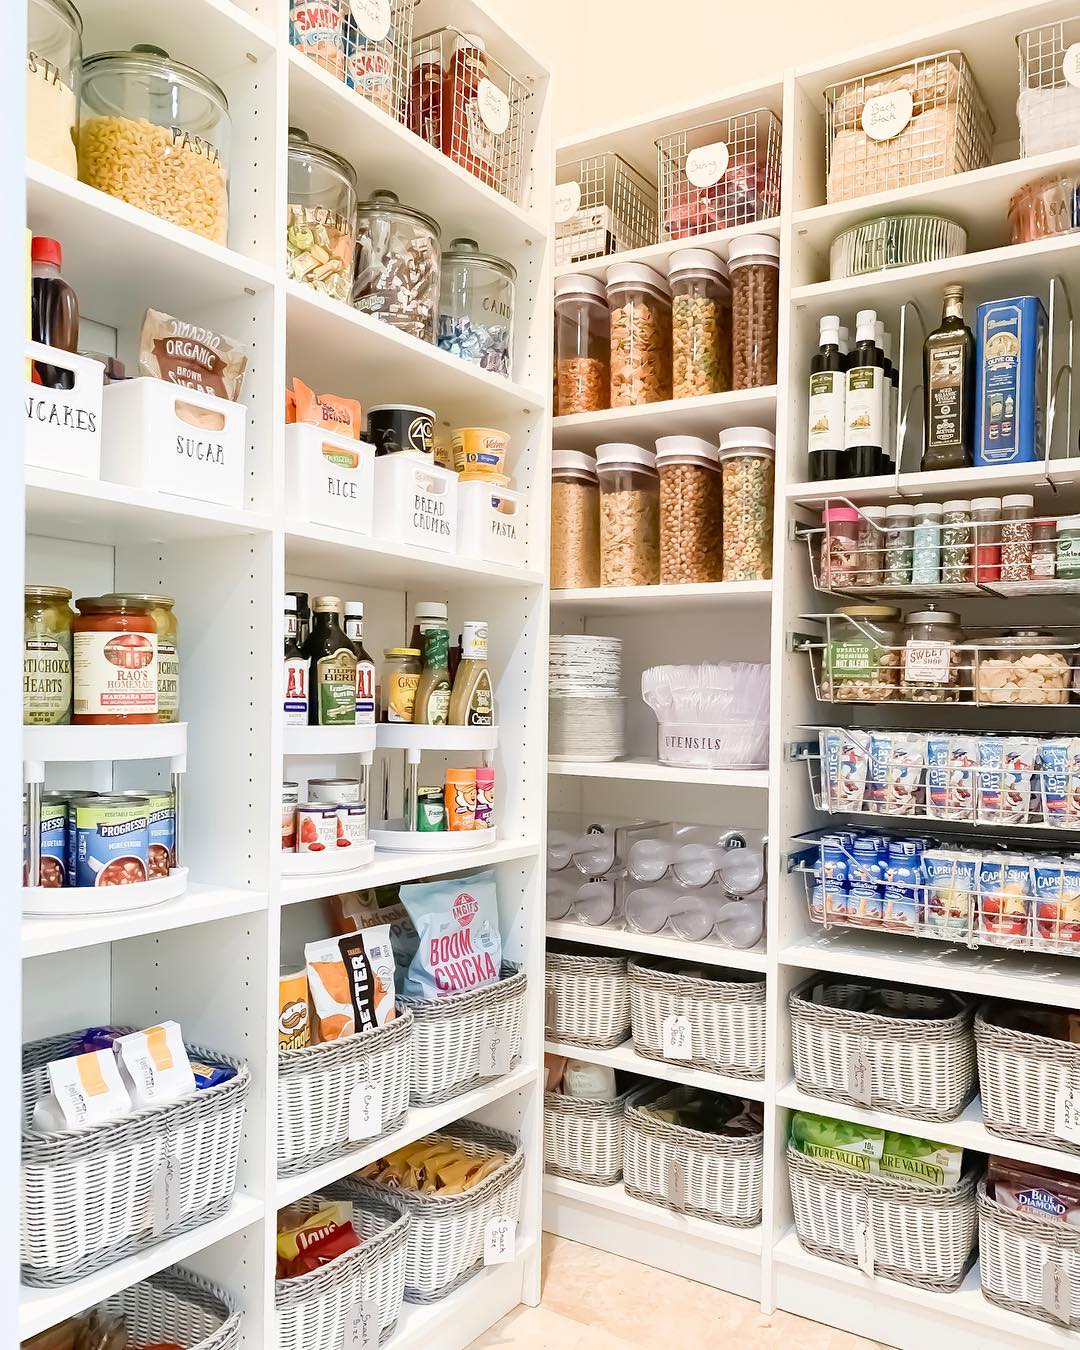
Organizing Pantry Items
Organizing pantry items creates a clean, easy-to-use space. It helps find ingredients quickly and keeps food fresh longer. A well-organized pantry saves time and reduces food waste. Start by sorting items and then use containers and labels to keep everything neat.
Sorting And Categorizing Supplies
Begin by taking everything out of the pantry. Group items into categories like canned goods, grains, snacks, and spices. Check expiration dates and remove expired products. Sort similar items together for easy access.
- Dry goods: rice, pasta, flour
- Canned foods: beans, soups, vegetables
- Snacks: chips, nuts, granola bars
- Spices and seasonings
- Baking supplies: sugar, baking soda
Keep frequently used items at eye level. Place heavier items on lower shelves for safety. Arrange rarely used items higher or in the back.
Using Containers And Labels
Use clear containers to store loose items. Containers protect food from pests and moisture. They also create a uniform look that is easy to manage.
- Choose airtight containers for grains and cereals
- Use stackable bins to save space
- Pick containers with wide openings for easy access
Label each container clearly with the item name and expiration date. Use simple labels that anyone can read at a glance. This practice prevents confusion and helps maintain order over time.
Maintaining Shelf Durability
Maintaining the durability of your pantry storage shelves is key to keeping them reliable and safe for long-term use. Shelves that are well cared for will hold up better under weight and resist damage from spills or humidity. Taking a little time regularly to maintain them helps you avoid costly repairs or replacements later.
Regular Cleaning Tips
Dust and crumbs can build up on your shelves, attracting pests and causing stains. Wipe down your shelves at least once a week with a damp cloth and mild soap. Avoid soaking the wood or particleboard; excess moisture can weaken the material over time.
Use a soft brush or vacuum to clean hard-to-reach corners and edges. For metal shelves, check for rust spots and treat them promptly with a rust remover or touch-up paint. Do you notice any sticky residue or spills? Clean them immediately to prevent permanent marks.
Checking For Wear And Tear
Regularly inspect your shelves for signs of damage. Look for cracks, warping, or sagging, especially in the middle of the shelves where weight is concentrated. Tighten any loose screws or brackets to keep everything sturdy.
Don’t ignore small issues like chipped edges or peeling paint. These can be early warnings of more serious problems. Have you ever caught a shelf bowing before it broke? Catching these signs early can save you from a messy spill and the hassle of reinstalling shelves.
Frequently Asked Questions
What Materials Are Best For Pantry Storage Shelves?
Wood and metal are popular for pantry shelves. Wood offers a classic look and durability. Metal is sturdy and moisture-resistant. Choose based on your pantry style and budget. Proper materials ensure long-lasting, functional shelves.
How Do I Measure Space For Pantry Shelves?
Measure pantry width, height, and depth accurately. Consider shelf thickness and clearance for jars. Ensure space fits your storage needs. Proper measurements help avoid buying wrong-sized shelves or materials.
How Can I Maximize Pantry Shelf Storage?
Use adjustable shelves to customize space. Add clear bins or baskets for organization. Utilize vertical space with tiered shelves. Label containers for easy access. These tips improve storage efficiency and pantry appearance.
What Tools Are Needed To Build Pantry Shelves?
Basic tools include a drill, level, tape measure, and saw. Screws, brackets, and anchors secure shelves firmly. Having the right tools ensures safe, sturdy shelf installation.
Conclusion
Building pantry storage shelves brings order to your kitchen space. You save time by finding items quickly. Shelves help keep food fresh and easy to reach. Choose materials that fit your budget and style. Measure your space carefully before you start.
Take your time to install shelves safely. Enjoy a tidy pantry that makes cooking simpler. Small steps lead to big changes in your home. Start today and see the difference it makes.