Are your kitchen drawers a constant mess? You’re not alone. You need to know how to make kitchen drawer organizers cheap.
Cluttered drawers can make cooking frustrating and slow you down. But what if you could organize your kitchen without spending a fortune? You’ll discover simple and affordable ways to make your own kitchen drawer organizers. These easy ideas will save you money and transform your space, so you can find everything quickly and enjoy a stress-free cooking experience.
Ready to take control of your kitchen clutter? Keep reading to learn how!
Credit: www.christeneholderhome.com
Materials You Need
Creating kitchen drawer organizers doesn’t have to drain your wallet. The key lies in selecting the right materials that are both affordable and effective. Gathering these supplies thoughtfully ensures your DIY project stays budget-friendly without sacrificing quality or functionality.
Affordable Supplies
- Cardboard Boxes:Strong and versatile, they can be cut to fit any drawer size. Look for sturdy packaging from recent deliveries.
- Plastic Containers:Reuse containers from food storage or buy inexpensive bins at dollar stores. They add durability and a clean look.
- Foam Board or Craft Foam:These materials provide cushioning and structure. They’re cheap and easy to cut with scissors.
- Fabric Scraps or Felt:Use these to line your organizers, preventing items from sliding around. Old clothes or craft remnants work perfectly.
- Velcro Strips or Double-Sided Tape:These help keep dividers in place and allow for adjustability. Both are cost-effective and widely available.
- Cardstock or Thick Paper:Great for creating smaller compartments or labels. It’s inexpensive and adds a neat finish.
Have you noticed how many useful materials you already have at home? Before buying anything, check your recycling bin or craft drawer—you might find hidden gems that fit perfectly.
Tools For Diy
- Scissors or Utility Knife:Essential for cutting cardboard, foam, or fabric precisely. Keep them sharp to avoid ragged edges.
- Ruler or Measuring Tape:Accurate measurements make a huge difference. Taking time here saves frustration later.
- Hot Glue Gun or Strong Adhesive:Ideal for securing pieces together quickly and firmly. A glue gun is inexpensive and worth the investment.
- Marker or Pencil:Use these to mark cutting lines or label compartments. Clear markings help maintain neatness.
- Cutting Mat or Protective Surface:Protect your workspace and make cutting safer and easier.
Do you own these simple tools already? Using what’s at hand not only cuts costs but speeds up your project. If you don’t, most of these items are affordable and multipurpose, making them smart buys for future projects too.

Credit: www.fromhousetohome.com
Planning Your Organizer
Planning your kitchen drawer organizer is the key to creating a functional and budget-friendly solution. Taking time to think through the specifics saves you from costly mistakes later. You want your organizer to fit perfectly and hold exactly what you need.
Measuring Your Drawers
Start by measuring the inside dimensions of your drawers carefully. Use a tape measure and note the length, width, and depth. Double-check these measurements to avoid surprises.
Consider any drawer dividers or built-in sections that might affect usable space. Ask yourself: How much room do I really have for organizing utensils or gadgets? Accurate measurements help you choose or create organizers that fit snugly without wasting space.
Designing The Layout
Think about what items you store and how often you use them. Group similar things together, like spoons with spoons, and knives with knives. This makes it easier to find what you need quickly.
Sketch a simple layout on paper or use a free online tool. Mark where compartments will go based on your drawer’s measurements and the items’ sizes. Would a few larger sections or many small ones work better for you?
Remember, flexibility matters. You might want to create removable dividers or adjustable sections so your organizer can adapt as your needs change. Planning your layout carefully ensures your cheap organizer feels like a custom fit.
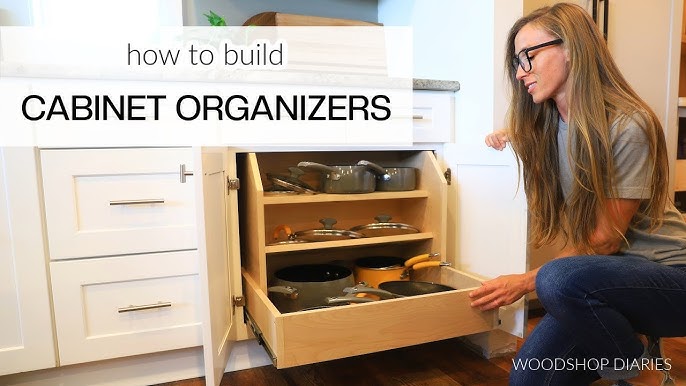
Diy Organizer Ideas
Create kitchen drawer organizers using inexpensive materials like cardboard or plastic containers. Cut and fit them to separate utensils, keeping drawers neat and easy to use. This simple DIY saves money and reduces clutter effectively.
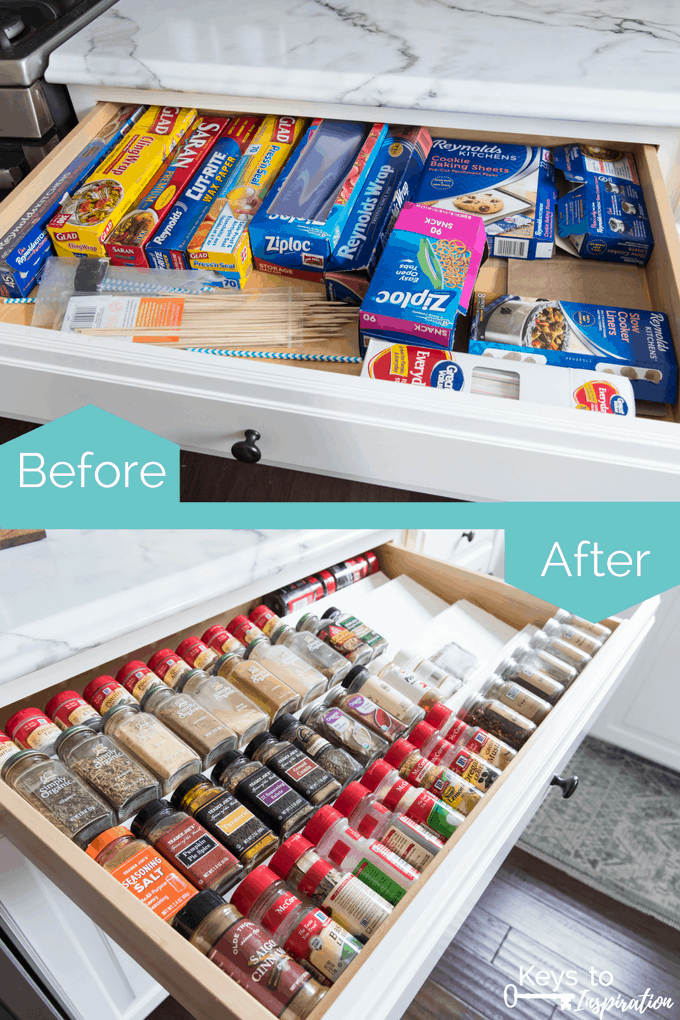
Looking for ways to tidy up your kitchen drawers without breaking the bank? DIY organizer ideas are not only cost-effective but also allow you to customize your storage solutions. Crafting your own organizers can transform chaotic spaces into orderly havens.
Using Cardboard Dividers
Cardboard is an excellent material for making drawer dividers. It’s readily available, easy to cut, and can be customized to fit any drawer size. Simply gather some cardboard from old boxes, cut it into strips, and piece them together to create compartments. Want to add a splash of personality? Wrap the cardboard in decorative paper. This not only strengthens the dividers but also adds a stylish touch. Remember, you can adjust the number and size of compartments based on your needs.
Repurposing Household Items
Look around your home for items that could serve as organizers. Ice cube trays, muffin tins, and even small Tupperware containers can be repurposed to keep your utensils and gadgets in order. These items provide ready-made compartments and can be easily rearranged as your storage needs evolve. Think outside the box. An old cutlery tray or a shallow box lid might just be the perfect solution to your cluttered drawers. By repurposing, you’re not only saving money but also giving new life to items you might otherwise discard.
Crafting With Foam Boards
Foam boards offer a sturdy alternative to cardboard and can be found at most craft stores. They’re easy to cut and assemble, making them ideal for creating durable drawer dividers. Measure your drawer dimensions, cut the foam board accordingly, and slot the pieces together. Want a more finished look? Cover the foam boards with contact paper or fabric. This not only enhances durability but also adds a chic element to your DIY project. Foam boards provide the flexibility to design custom layouts suited perfectly to your kitchen needs. Crafting your own organizers can be both fun and practical. Which method will you try first to bring order to your kitchen chaos?

Credit: www.reddit.com
Assembly Tips
Getting your kitchen drawer organizers assembled right can save you time and frustration later. Paying attention to small details during assembly ensures your organizer not only fits perfectly but lasts long. Let’s dive into some practical tips that make the process smoother and the result sturdier.
Cutting And Shaping Materials
Accurate cuts are the backbone of a well-fitting organizer. Use a ruler and pencil to mark your materials clearly before cutting. If you’re working with wood or acrylic, a fine-toothed saw or utility knife helps achieve cleaner edges.
Don’t rush the shaping process. Sand down rough edges gently to avoid splinters and ensure your pieces slide easily into place. Have you ever tried forcing a miscut divider only to damage the whole organizer? Taking your time here avoids that hassle.
Securing Dividers
Choosing the right method to hold dividers in place affects both the look and durability of your organizer. For lightweight materials, double-sided tape or removable adhesive strips work well and allow repositioning. If you want a permanent hold, a small amount of wood glue or hot glue provides solid bonding without mess.
Make sure dividers stand straight and don’t wobble before the glue sets. Clamping pieces or placing a heavy book on top can help maintain pressure during drying. What’s your go-to for a secure but clean finish?
Ensuring Durability
Durability depends on both materials and assembly quality. Reinforce corners and joints with small brackets or extra glue for added strength. If your organizer will hold heavy utensils, consider layering a thin piece of plywood underneath for support.
Think about the drawer environment too—moisture from kitchen use can weaken glue and warp wood. Applying a clear sealant or varnish protects your organizer from damage and keeps it looking fresh. How do you plan to make your organizer last through daily kitchen chaos?
Customizing Organizers
Customizing kitchen drawer organizers makes your space more personal and efficient. It helps find items quickly and keeps everything neat. Simple changes can turn basic organizers into unique storage solutions. Personal touches save money and add style.
Adding Labels
Labels help identify items fast. Use a label maker or write on masking tape. Stick labels on each section or container inside the drawer. Clear labels reduce time spent searching for utensils or tools. Change labels easily if you rearrange things later.
- Use bold, easy-to-read fonts.
- Choose waterproof labels for durability.
- Color-code labels for different categories.
Using Decorative Touches
Decorative touches make organizers look nice and inviting. Paint wooden dividers with bright colors or patterns. Add washi tape along the edges for a fun look. Use fabric or shelf liners with prints to protect surfaces and add style. These small details make your kitchen feel welcoming.
- Choose colors that match your kitchen theme.
- Use stickers or stamps for extra flair.
- Try simple stencils for neat designs.
Maintenance And Upkeep
Keeping kitchen drawer organizers clean and well-arranged helps maintain a neat kitchen space. Proper maintenance extends the life of your organizers and keeps items easy to find. Simple habits can make a big difference in how your kitchen feels every day.
Cleaning Tips
Remove all items before cleaning your drawer organizers. Use a damp cloth or mild soap to wipe down surfaces. Avoid harsh chemicals that can damage materials. Let organizers dry completely before placing items back inside. Regular cleaning prevents dirt buildup and keeps drawers smelling fresh.
Rearranging For Efficiency
Check your drawer layout every few weeks. Move items based on how often you use them. Place daily tools in front for quick access. Group similar items together to save space. Adjust compartments to fit new utensils or gadgets. Small changes improve your kitchen workflow and reduce clutter.
Frequently Asked Questions
What Materials Are Best For Cheap Kitchen Drawer Organizers?
Affordable materials like cardboard, plastic bins, and wooden dividers work great. They are easy to cut, shape, and customize. These options keep costs low while providing sturdy and functional organization for kitchen drawers.
How Can I Customize Drawer Organizers On A Budget?
Use recycled containers, craft foam, or inexpensive wooden slats. Measure your drawer size carefully before cutting. Painting or covering with decorative paper adds a personal touch without spending much.
Are Diy Kitchen Drawer Organizers Durable And Effective?
Yes, with proper materials and construction, DIY organizers are durable. They help keep utensils and tools neatly separated. Regular maintenance ensures they last and maintain their functionality over time.
Can I Make Kitchen Drawer Organizers Without Special Tools?
Absolutely. Basic tools like scissors, a ruler, and glue suffice. Many projects require simple cutting and assembling. This makes DIY organizers accessible to anyone, even beginners.
Conclusion
Making cheap kitchen drawer organizers is simple and effective. Use materials you already have at home. Cut and arrange items to fit your drawers. This saves money and keeps your kitchen tidy. Small steps bring big changes to your space.
Organizing your drawers helps find things quickly. A neat kitchen feels calm and welcoming. Try these ideas to create your own organizers today. Enjoy a clutter-free kitchen without spending much.