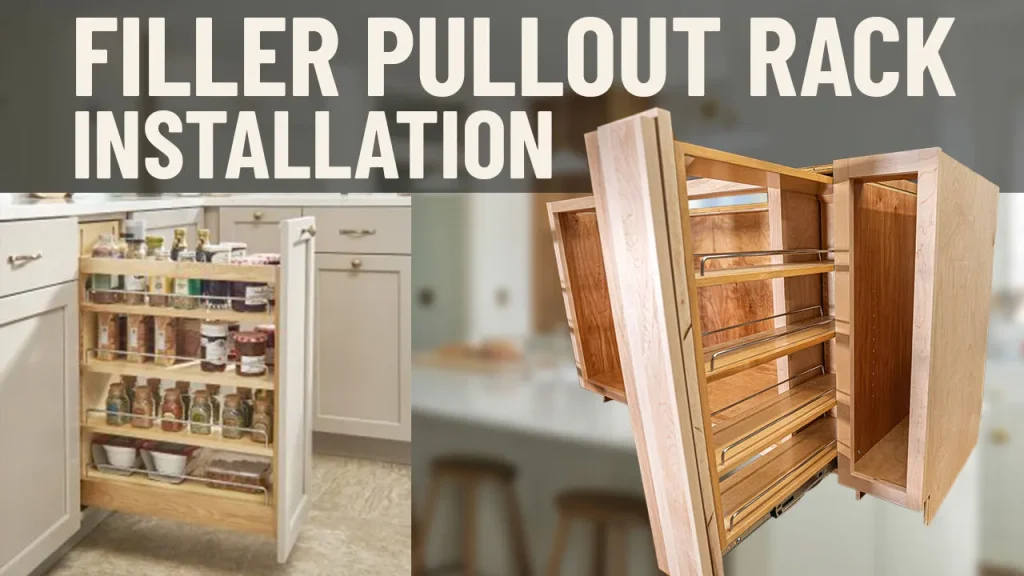
Are you tired of cluttered kitchen cabinets and wasted space? Installing a sliding spice rack could be the perfect solution to keep your spices organized and easy to find.
Imagine reaching for your favorite seasoning without digging through messy shelves. In this guide, you’ll discover simple, step-by-step instructions to install your own sliding spice rack quickly and with minimal effort. By the end, your kitchen will feel more organized, efficient, and enjoyable to cook in.
Let’s get started!
Choosing The Right Sliding Spice Rack
Choosing the right sliding spice rack makes a big difference in kitchen organization. It saves space and keeps spices easy to reach. A well-chosen rack fits perfectly and lasts a long time. Consider important factors before buying. These include space size, material, design, weight capacity, and rack size.
Measuring Your Cabinet Space
Measure the inside width, height, and depth of your cabinet. Write down the numbers to avoid mistakes. Check for any obstacles like pipes or shelves inside. Leave some space for smooth sliding. Accurate measurements ensure the rack fits well without problems.
Materials And Designs
Choose materials that match your kitchen style and resist moisture. Common options include wood, metal, and plastic. Wood adds warmth but may need more care. Metal is strong and modern but may rust. Plastic is light and affordable but less durable. Pick a design that suits your cabinets and kitchen décor.
Weight Capacity And Size
Consider the number of spice jars you want to store. Check the rack’s weight limit to avoid damage. A stronger rack handles more jars and heavier bottles. The size should fit your spice collection without crowding. A good rack holds spices securely and slides easily.
Gathering Tools And Materials
Before you start installing your sliding spice rack, gathering the right tools and materials is crucial. Having everything on hand saves time and prevents frustration. It also helps you avoid unnecessary trips to the hardware store.
Essential Tools Checklist
- Measuring Tape:Accurate measurements ensure your rack fits perfectly in the designated space.
- Electric Drill:This tool makes drilling holes for screws quick and easy.
- Level:Keeps your spice rack straight, preventing uneven sliding or wobbling.
- Screwdriver:Both Phillips and flathead types may be needed depending on the screws.
- Pencil:Marking spots for drilling is easier when you have a clear guide.
- Stud Finder:Helps locate wall studs to securely anchor your rack.
I once underestimated the value of a level and ended up with a crooked rack that made sliding frustrating. Avoid this by double-checking with a level before you drill.
Additional Supplies Needed
- Screws and Anchors:Choose appropriate sizes and types for your wall material (drywall, tile, wood).
- Mounting Brackets:Often included with the rack but verify you have the right ones.
- Sandpaper:Useful if you need to smooth rough edges or adjust the rack size slightly.
- Cleaning Cloth:To wipe down surfaces before mounting for better adhesion and cleanliness.
Think about the wall surface where you’ll mount the rack. Are drywall anchors necessary, or will screws alone hold? Knowing this beforehand can save you from weak mounts and falling racks.
Ready to gather your tools? Make a checklist and tick off each item as you collect it. This simple step can keep your installation process smooth and efficient.
Preparing The Cabinet Area
Preparing the cabinet area is a crucial step before installing your sliding spice rack. Taking the time to get this right ensures a smooth installation and long-lasting results. It also helps avoid common frustrations like misaligned racks or damaged cabinets.
Clearing And Cleaning
Start by removing everything from the cabinet you plan to use. Spices, jars, and other items can get in your way or cause damage during installation.
Next, clean the cabinet thoroughly. Dust and grease buildup can affect how well the rack attaches, so wipe down all surfaces with a mild cleaner and a damp cloth. Let it dry completely before moving forward.
Checking Cabinet Structure
Take a close look at the cabinet’s interior walls and base. Are they sturdy enough to hold the weight of a loaded spice rack? Weak or damaged panels might need reinforcement.
Check for any signs of moisture or warping. These issues can cause the sliding mechanism to malfunction or the rack to loosen over time.
Measure the cabinet’s height, width, and depth carefully. Are there any obstacles like pipes or wiring inside? Knowing this helps you pick the right rack size and avoid surprises during installation.

Credit: www.lowes.com
Marking Installation Points
Marking installation points is crucial for a smooth sliding spice rack setup. Accurate markings ensure the rack aligns perfectly with your cabinet space. Begin with a clear plan to avoid future adjustments.
Aligning The Rack
First, position the sliding spice rack inside the cabinet. Ensure it fits comfortably without obstruction. Check the space around for smooth sliding. Adjust the rack until it’s centered within the cabinet space.
Using A Level For Precision
Place a level on top of the rack. This tool ensures the rack sits perfectly horizontal. Adjust the rack until the bubble is centered on the level. Mark the points where the rack will be installed. These marks guide where to drill holes later.
Use a pencil for these marks to easily adjust if needed. Double-check the alignment and level before proceeding with drilling. A well-placed rack guarantees smooth operation and easy spice access.
Mounting The Sliding Rack
Mounting the sliding spice rack properly is key to making sure it holds steady and functions smoothly every day. The process might seem simple, but a few careful steps can save you from future hassle and damage. Let’s focus on how to prepare your wall and secure the rack so it stays put and performs well over time.
Drilling Pilot Holes
Before you start drilling, mark the exact spots where the screws will go. Use a pencil and a level to ensure the rack will be perfectly straight. This step helps avoid crooked mounting and wasted effort.
Drilling pilot holes is essential because it guides the screws in and prevents the wood or drywall from splitting. Use a drill bit slightly smaller than the screw diameter to create these holes. Take your time and drill slowly to keep the hole clean and precise.
Have you ever tried to force a screw without a pilot hole? It usually ends in frustration and a damaged surface. Avoid that by making pilot holes your go-to step—it’s a small effort that pays off big.
Attaching The Rack Securely
Once your pilot holes are ready, align the sliding rack with the marks. Hold it firmly in place and start inserting the screws. Tighten them evenly to ensure the rack doesn’t lean or wobble.
If you’re mounting on drywall, consider using anchors for extra support. They spread the weight and keep the rack secure, especially when loaded with jars. This small addition can prevent your rack from pulling out and causing damage.
Check the rack’s stability by gently sliding it back and forth. If it feels loose, tighten the screws a bit more or double-check the anchors. A secure fit means your spices will stay organized and your kitchen will stay neat.

Credit: www.youtube.com
Testing And Adjusting
After installing your sliding spice rack, testing and adjusting it is crucial to ensure smooth operation and long-term durability. This phase helps you catch any issues early and fine-tune the rack for effortless sliding. Taking the time now saves frustration later when grabbing your favorite spices.
Sliding Mechanism Check
Start by gently pulling the rack out and pushing it back in several times. Pay attention to any sticking points or unusual resistance. Does the rack slide smoothly without jerking or wobbling?
Listen closely for squeaks or grinding noises—these often signal alignment problems or the need for lubrication. Check that the rack stays securely on its tracks and doesn’t tilt or shift side to side.
Imagine reaching for a spice jar and having the rack jam halfway; that’s what you want to avoid. Testing now ensures your spice rack feels sturdy and reliable every time you use it.
Making Necessary Adjustments
If you notice issues during your sliding test, don’t worry; most are fixable with simple tweaks. Start by loosening the screws holding the rack slightly, then realign it to sit perfectly straight on the rails.
Try adding a small amount of silicone spray or a dry lubricant to the sliding tracks to reduce friction. Avoid oil-based lubricants that can attract dust and grime.
Check if the mounting brackets are tightened enough but not overly so—too tight can restrict movement. Adjust the position of the rack incrementally, testing the slide after each change until it glides effortlessly.
Have you ever had to adjust something more than once? Sometimes patience and small corrections make all the difference in achieving smooth function.
Organizing Your Spices
Organizing your spices effectively can transform your cooking experience. A well-arranged sliding spice rack not only saves time but also keeps your kitchen tidy. When spices are easy to find and access, you’ll enjoy more fluid meal preparation and less frustration.
Labeling And Arranging
Clear labeling is key to making your spice rack work for you. Use simple, readable labels on the tops or fronts of spice jars so you can spot what you need at a glance.
Arrange spices either alphabetically or by frequency of use. Grouping similar flavors like herbs, baking spices, and hot spices together helps you navigate quickly.
Think about how you cook—do you reach for certain spices more often? Place those at eye level or in the most accessible spots on your sliding rack to speed up your workflow.
Maximizing Space Efficiency
Sliding spice racks are designed to save space, but you can boost that efficiency further. Use uniform-sized jars to fit more spices neatly without wasted gaps.
Consider stacking jars with tiered organizers or using small risers inside the rack for better visibility of all labels. This prevents you from digging through clutter.
Don’t forget to check the depth of your rack. Slimmer jars or refillable containers can help you maximize every inch of storage while keeping your spices fresh.
Credit: www.amazon.com
Maintenance Tips
Keeping your sliding spice rack in top shape ensures it stays functional and looks great over time. Regular maintenance not only improves its appearance but also helps you avoid unexpected wear and tear. Here are some practical tips to keep your spice rack running smoothly and looking fresh.
Cleaning The Rack
Dust and spills can quickly build up on your spice rack, especially in a busy kitchen. Clean it regularly with a soft cloth and mild soap to remove grease and dirt without damaging the finish.
Pay attention to the sliding mechanism. Dirt and crumbs can get stuck in the tracks, causing it to jam. Use a small brush or a vacuum with a brush attachment to clear out debris.
Have you noticed any sticky residue? A gentle wipe with a vinegar solution can break down grime without harsh chemicals. Avoid soaking wooden racks; instead, wipe them lightly and dry immediately.
Ensuring Long-term Durability
Check the screws and fittings periodically to make sure everything stays tight. Loose parts can cause the rack to wobble or slide unevenly, which may shorten its lifespan.
Lubricate the sliding tracks with a small amount of silicone spray or wax. This keeps the movement smooth and prevents rust on metal parts.
Think about the placement of your spice rack. Avoid spots near the stove or sink where heat and moisture are high, as these conditions can warp wood or corrode metal.
Have you ever experienced a sliding rack that suddenly became difficult to open? Regular attention can prevent that frustrating moment and keep your kitchen routine seamless.
Frequently Asked Questions
What Tools Are Needed To Install A Sliding Spice Rack?
You need a drill, screwdriver, measuring tape, pencil, screws, and wall anchors. These tools help secure the rack properly and ensure it slides smoothly.
How Do I Measure Space For A Sliding Spice Rack?
Measure the cabinet width, height, and depth. Ensure enough clearance for the rack to slide out fully without obstruction.
Can I Install A Sliding Spice Rack Without Drilling?
Some racks use adhesive strips or tension rods. However, drilling provides a sturdier and more durable installation for heavy spice jars.
How Much Weight Can A Sliding Spice Rack Hold?
Most sliding spice racks hold between 10 to 30 pounds. Check the manufacturer’s weight limit to avoid damage or failure.
Conclusion
Installing a sliding spice rack can save space and keep your kitchen neat. Follow each step carefully for the best fit and function. Use the right tools and measure twice to avoid mistakes. A well-installed rack makes cooking easier and spices easy to reach.
Enjoy a tidier kitchen and faster meal prep with your new rack. Keep your spices organized and your kitchen looking great. Simple changes like this make a big difference every day.