
Are your spice jars scattered all over the kitchen, making it hard to find what you need when you cook? Imagine having a neat, custom spice rack that keeps everything organized and easy to reach.
You don’t have to spend a lot of money or time—building your own spice rack is simpler than you think. In this guide, you’ll discover step-by-step how to DIY a spice rack that fits your space and style perfectly. Ready to transform your kitchen and make cooking more enjoyable?
Let’s get started!
Choosing The Right Spice Rack Style
Choosing the right spice rack style sets the foundation for your DIY project. It impacts not just the look of your kitchen but also how easily you can access your spices during cooking. Think about your kitchen space, your cooking habits, and how you want your spices organized before deciding.
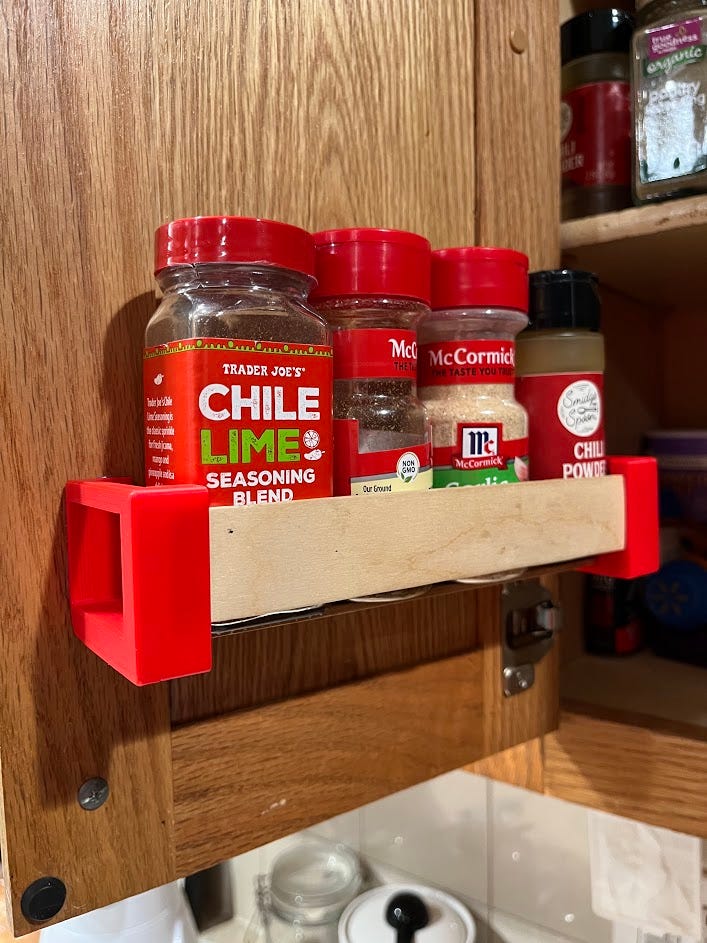
Wall-mounted Options
Wall-mounted spice racks save countertop space and keep your spices visible and easy to reach. They can be simple wooden shelves, metal racks, or even creative magnetic strips.
If you have a small kitchen, this style helps free up precious counter area. Plus, mounting your rack at eye level can speed up your cooking process since you won’t have to dig through cabinets.
Have you measured your wall space? Ensure the rack won’t interfere with other kitchen activities like opening cabinet doors or appliances.
Countertop Designs
Countertop spice racks offer flexibility since you can move them around as needed. They come in tiered stands, rotating carousels, or compact boxes with lids.
Consider how much counter space you can dedicate without cluttering your work area. If you cook often and need quick access to spices, a rotating carousel could be a great choice.
Think about how easy it will be to refill and clean the rack, especially if you like to switch out spices frequently.
Drawer Inserts
Drawer inserts keep spices neatly organized and out of sight, which is perfect if you prefer a minimalist kitchen look. These inserts come with angled slots or compartments to hold spice jars securely.
This style requires a dedicated drawer but can make your cooking space look cleaner and more streamlined. It also protects your spices from light, which helps them stay fresh longer.
Ask yourself if your drawers are deep and wide enough to fit a spice insert comfortably without affecting other storage needs.

Credit: duboisdesigns.co.uk
Selecting Materials And Tools
Choosing the right materials and tools can make your DIY spice rack project smoother and more enjoyable. The quality of wood and the tools you use will affect both the look and durability of your finished piece. Think about what fits your style and skill level before starting.
Wood Types And Finishes
Picking the right wood is crucial for a sturdy and attractive spice rack. Pine is affordable and easy to work with, making it great for beginners. Hardwood options like oak or maple offer more durability but might require more effort to cut and sand.
Consider the finish carefully—it protects the wood and enhances its appearance. You can choose between natural oils, varnishes, or paint, depending on whether you want a rustic or modern look. Remember, a smooth finish also makes cleaning easier, which is important in the kitchen.
Basic Tools Needed
Gathering the right tools keeps your project efficient and safe. At minimum, you’ll need a saw to cut wood to size, a drill for assembling pieces, and sandpaper for smoothing edges. A measuring tape and a pencil are essential for accuracy.
If you have access, a power drill and a miter saw can speed up the process significantly. But don’t worry if you don’t—manual tools work just fine if you take your time. What tools do you already have that could fit into this project?
Safety Gear
Protecting yourself is non-negotiable during any DIY task. Safety goggles shield your eyes from flying wood chips and dust. Gloves protect your hands from splinters and sharp edges.
A dust mask is also wise, especially when sanding or cutting wood, to avoid inhaling fine particles. Have you checked your safety gear before starting? It’s easy to overlook, but small precautions prevent big problems.
Measuring And Planning Your Rack
Creating a spice rack can be a fun DIY project. It helps organize your kitchen and saves space. Before building, measuring and planning are crucial steps. They ensure your spice rack fits perfectly in your kitchen.
Determining Space And Size
First, find a suitable spot for your spice rack. It could be a wall, pantry door, or cabinet. Measure the height and width of this space. This determines how big your spice rack can be. Consider the number of spice jars you have. Ensure the rack can hold them all comfortably.
Sketching Your Design
Sketch your spice rack design on paper. It doesn’t have to be perfect. Include the number of shelves and their spacing. Think about whether you want a modern or rustic look. Use your measurements to ensure accuracy. This will guide you when building your rack.
Organizing Spice Jars
Organize your spice jars by size and type. Group similar jars together for easy access. Decide if you want the jars labeled. Consider clear labels for easy identification. Arrange them in a way that fits your cooking habits. This makes cooking more efficient and enjoyable.
Cutting And Assembling The Pieces
Cutting and assembling the pieces is a crucial part of building your own spice rack. This phase shapes the rack and ensures it holds together well. Precise cutting and careful joining make your project sturdy and neat. Follow these guidelines to achieve smooth, professional results.
Cutting Wood Accurately
Measure each piece twice before cutting. Use a sharp saw for clean edges. Mark cutting lines clearly with a pencil. Keep the wood steady while cutting to avoid mistakes. Cut slowly to prevent splintering. Choose the right type of wood for your rack’s size and style.
Joining Techniques
Choose a strong method to join the pieces. Wood glue is simple and effective for small racks. Use clamps to hold pieces together while the glue dries. Nails or screws add extra strength. Drill pilot holes to avoid splitting the wood. Consider corner brackets for added support.
Sanding And Smoothing
Sand all surfaces after assembly for a smooth finish. Start with medium-grit sandpaper to remove rough spots. Finish with fine-grit paper for softness. Sand edges to prevent splinters. Wipe dust off with a damp cloth before painting or staining. Smooth wood looks better and lasts longer.
Finishing Touches And Installation
Finishing touches and installation are what transform your DIY spice rack from a simple wooden frame into a functional and attractive kitchen staple. These final steps not only protect your work but also add personality and ensure your rack stays put when you reach for your favorite spices. Paying attention to these details will make your project feel complete and tailored to your space.
Applying Paint Or Stain
Choose a paint or stain that matches your kitchen decor and protects the wood from moisture and spills. If you want a natural look, a clear wood stain enhances the grain and adds warmth. For a pop of color, pick a durable paint designed for wood surfaces.
Apply thin, even coats with a brush or cloth, letting each coat dry fully before adding the next. This prevents drips and uneven color. Don’t forget to sand lightly between coats for a smooth finish.
Adding Labels And Decorations
Labels help you stay organized and add charm to your spice rack. You can use pre-made stickers, write on chalkboard paint panels, or create custom labels with a label maker. Think about readability—clear, simple fonts work best.
Decorations can be subtle or bold depending on your style. Try small decals, washi tape borders, or even tiny hooks for hanging measuring spoons. What personal touches will make your spice rack uniquely yours?
Mounting The Rack Securely
Secure mounting keeps your spice rack stable and safe, especially if it holds heavy jars. Use wall anchors or toggle bolts suitable for your wall type—drywall, plaster, or tile. Screws alone might not hold up under weight.
Check that the rack is level before tightening screws completely. If possible, attach it to wall studs for maximum support. Have you tested your rack’s sturdiness by gently tugging it after installation?
Credit: tibbbz.medium.com
Maintaining And Updating Your Spice Rack
Keeping your DIY spice rack in top shape ensures your spices stay fresh and your kitchen looks inviting. Regular care and smart updates can make a big difference in how functional and attractive your rack remains over time. Let’s look at simple ways you can maintain and even improve your spice rack’s usefulness and style.
Cleaning Tips
Dust and spills can quickly dull your spice rack’s appearance. Wipe down shelves and containers regularly with a damp cloth to prevent buildup. Avoid harsh chemicals; a mild soap solution usually does the trick and keeps labels intact.
Check for any sticky residue from spilled spices. A gentle scrub with a soft brush can help without damaging wood or paint. You might be surprised how much fresher your rack looks after just a quick clean.
Refilling And Organizing
Keep an eye on spice levels to avoid running out mid-recipe. Refill jars promptly to maintain your cooking flow. Group spices by type or frequency of use—this cuts down on time hunting for the right flavor.
- Place everyday essentials like salt, pepper, and garlic powder within easy reach.
- Arrange herbs alphabetically or by cuisine type to find them faster.
- Use uniform containers to save space and create a neat look.
Have you noticed how reorganizing your spices can actually inspire new meals? It’s a small change that refreshes your cooking routine.
Creative Upgrades
Think about adding labels or chalkboard tags to your spice jars for a personalized touch. This helps you quickly identify spices and adds charm. You can also install small LED lights beneath shelves to brighten the area and showcase your collection.
If space is tight, consider magnetic jars that stick to the rack’s side or the fridge. This clever use of space can free up room and keep your spices visible. What’s one upgrade you could make today that would improve your kitchen’s vibe or your cooking efficiency?

Credit: shopping.yahoo.com
Frequently Asked Questions
What Materials Do I Need To Diy A Spice Rack?
You need wood, screws, nails, sandpaper, paint or stain, and mounting hardware. Basic tools like a saw and drill are essential. Choose materials based on your design and kitchen style for best results.
How Much Time Does A Diy Spice Rack Take?
A simple DIY spice rack usually takes 2-4 hours. More complex designs may require a full day. Time depends on your skill level and drying time for paint or stain.
What Is The Best Wood For A Spice Rack?
Pine, cedar, and oak are popular choices. They are durable, affordable, and easy to work with. Choose a wood that complements your kitchen décor for a polished look.
How Do I Mount A Spice Rack On The Wall?
Use a stud finder to locate studs for secure mounting. Mark drill points, use screws and anchors if needed. Ensure the rack is level for safe and stable installation.
Conclusion
Building your own spice rack saves money and adds style. It keeps spices neat and easy to find. Choose the size and design that fit your kitchen best. Use simple tools and follow clear steps to make it. This project suits beginners and helps organize cooking space.
Enjoy your homemade rack and the fresh flavors it holds. Try this easy DIY and brighten your kitchen today!