
Are you tired of digging through a messy drawer every time you need a spatula or a spoon? A cluttered kitchen utensil drawer can waste your time and add stress to your cooking routine.
But what if you could fix this without spending a lot of money? In this post, you’ll discover simple and inexpensive ways to create a kitchen utensil drawer organizer that fits your needs perfectly. You’ll learn how to turn everyday items into smart storage solutions that keep everything neat and easy to find.
Ready to transform your kitchen drawer and make cooking more enjoyable? Keep reading!
Choosing The Right Materials
Choosing the right materials for your kitchen utensil drawer organizer is key to balancing cost, durability, and environmental impact. The materials you pick will affect how long your organizer lasts and how it fits into your kitchen’s style. Let’s look at some options that suit different needs and budgets.
Affordable Options
Plastic bins and trays are some of the cheapest choices you can find. They are lightweight, easy to clean, and often come in various sizes and colors. If you want to add a personal touch, you can even paint or decorate them to match your kitchen.
Cardboard dividers are another budget-friendly choice. You can cut and shape them yourself, making them perfect for custom fits. Just make sure to protect them with a layer of contact paper or tape to increase their lifespan against spills.
Durability Considerations
Wood is a strong and lasting material for drawer organizers. Solid pine or bamboo are affordable woods that stand up well to daily use. They also add a warm, natural look to your kitchen, which plastic often lacks.
Metal organizers, especially those made from stainless steel or coated wire, resist wear and tear better than many other materials. They handle moisture well and are less likely to break or warp, but they can be more expensive upfront.
Eco-friendly Choices
If reducing waste matters to you, consider using reclaimed wood or repurposing old containers as organizers. These options not only save money but also keep materials out of the landfill.
Bamboo is another eco-friendly choice. It grows quickly and requires fewer resources than hardwoods. Plus, it’s naturally resistant to bacteria and water damage, making it ideal for kitchen use.
What materials do you already have around your home that could be transformed into a useful organizer? Sometimes the best solutions come from looking at what’s already available.
Measuring Your Drawer Space
Measuring your drawer space is the first step to creating a neat utensil organizer. Accurate measurements help you use every inch wisely. This saves money and avoids wasting materials.
Knowing the exact size of your drawer makes planning easier. It ensures your organizer fits well and holds all utensils comfortably. Measuring carefully prevents surprises during the build.
Taking Accurate Dimensions
Use a tape measure or ruler for precise results. Measure the drawer’s:
- Width – from left to right
- Depth – from front to back
- Height – inside the drawer
Take measurements twice to confirm accuracy. Write down the numbers clearly. Check for any drawer dividers or obstacles inside.
Planning For Different Utensil Sizes
Utensils come in many shapes and sizes. Forks, spoons, and knives need small sections. Larger tools like ladles or spatulas need bigger spaces.
Group utensils by size to decide compartment dimensions. Leave some extra space for easy access and future additions. This planning makes your organizer practical and flexible.
Diy Organizer Designs
Creating a kitchen utensil drawer organizer can be a fun DIY project. It saves money and helps in organizing your kitchen space. You can design organizers to fit your exact needs. Explore different styles and layouts to match your kitchen’s vibe. Let’s delve into some simple designs.
Basic Divider Layouts
Start with basic dividers. Use thin wooden planks or cardboard pieces. Cut them to fit your drawer size. Arrange them to create simple slots. This layout is perfect for separating utensils by type. Spoons in one section, forks in another. It keeps everything tidy and easy to find.
Creative Compartment Ideas
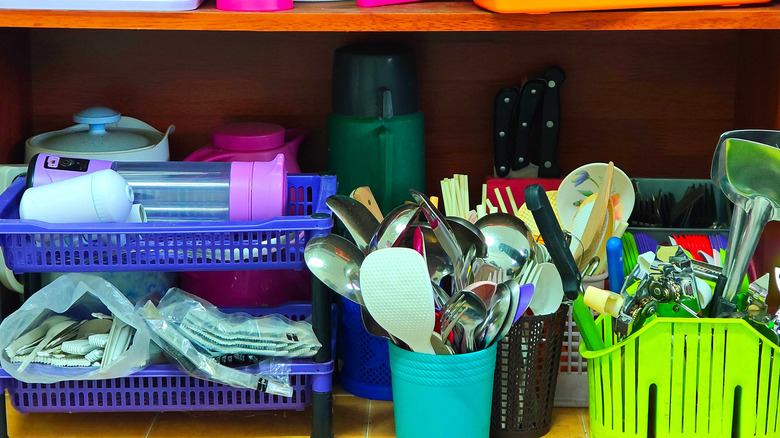
Get creative with compartments. Use small boxes or containers for different utensils. Repurpose items like ice cube trays or muffin tins. They make excellent holders for small kitchen tools. You can also use bamboo mats. Roll them up and place them in the drawer. They provide a unique look and are eco-friendly.
Use plastic or wooden cutlery trays. They can be customized easily. Add extra dividers using adhesive strips. This provides flexibility and maximizes space. Arrange the compartments according to your daily usage. This ensures efficiency and ease during cooking.
Credit: www.housedigest.com
Assembly Techniques
Assembly techniques can make or break your kitchen utensil drawer organizer project. The way you cut and join materials affects both the durability and the overall look. Simple, precise assembly steps save time and frustration, especially if you want something functional and neat.
Cutting And Shaping Materials
Start by choosing materials that are easy to handle, like thin plywood or sturdy cardboard. Using a sharp utility knife or a fine-toothed saw helps you make clean, straight cuts. Clean edges not only look better but also fit together more snugly.
Take your time measuring twice before cutting once. If you want custom compartments, think about how wide and deep each section needs to be. Have you ever tried cutting without a guide? Using a ruler or straight edge keeps cuts accurate and your organizer uniform.
Don’t forget to smooth rough edges with sandpaper or a file. This step makes the organizer safer and more comfortable to handle. Small details like rounded corners can also prevent drawer damage over time.
Joining And Securing Parts
How do you want your organizer to hold together? Glue works well for lightweight materials like cardboard or thin wood. Use wood glue or a strong craft glue and clamp parts for a few minutes to ensure a solid bond.
For added strength, small nails or staples can help, especially on wood. If you’re not comfortable with hammering, hot glue guns are a quick alternative that dries fast. Think about how you might want to disassemble or adjust the organizer later; sometimes screws or removable fasteners are best.
Using double-sided tape can also be a clever trick for temporary or adjustable sections. It’s easy to reposition and leaves no mess. Have you tried combining different joining methods? Mixing glue and tape can give you both strength and flexibility.
Customization Tips
Customizing your kitchen utensil drawer organizer makes it truly yours and adds a touch of personality to your cooking space. Simple tweaks can transform a basic organizer into a functional and visually appealing setup that fits your style and needs. Let’s look at some easy ways to customize without spending much.
Adding Labels
Labels help you keep everything in order and save time searching for utensils. You can use a label maker or create your own with paper and clear tape for a budget-friendly option.
Try labeling sections like “Spoons,” “Knives,” or “Measuring Cups” to make your drawer instantly navigable. If you share your kitchen, labels reduce confusion and keep everyone organized. Consider using different colors for each category to make it even easier to spot what you need.
Using Decorative Elements
Adding decorative touches can make your organizer more inviting and reflect your style. Think about using washi tape around compartments or colorful liners at the bottom of the drawer.
Small, inexpensive stickers or fun patterns on dividers can brighten up the space without cluttering it. Do you have a favorite color or theme in your kitchen? Matching your organizer’s decorations to that can tie the whole look together and make cooking feel more enjoyable.
Maintaining Your Organizer
Maintaining your inexpensive kitchen utensil drawer organizer is key to keeping your kitchen efficient and clutter-free. Regular care ensures your organizer lasts longer and continues to serve its purpose well. Taking simple steps to clean and adjust it will save you time and frustration later.
Cleaning Methods
Keeping your organizer clean is easier than you might think. Wipe it down weekly with a damp cloth to remove crumbs and spills. If your organizer is made of plastic or wood, use mild soap and water for a deeper clean.
For fabric or felt organizers, vacuuming helps remove dust and particles without damaging the material. Avoid harsh chemicals—they can degrade the organizer and leave unwanted smells. Have you noticed how a clean drawer just makes cooking feel smoother?
Adjusting Compartments Over Time
Your utensil needs will change, and so should your organizer’s layout. If you add new tools or find certain compartments too big or small, rearrange the dividers to fit your collection better. Many DIY organizers allow you to move or resize sections easily.
Try grouping utensils by frequency of use; keep daily essentials within easy reach. Don’t hesitate to remove unused compartments or add new ones for specialty tools. How often do you rethink your kitchen setup to improve your workflow?
Alternative Solutions
Finding the right organizer for your kitchen utensil drawer doesn’t have to drain your wallet. Alternative solutions can make your drawer tidy and functional without spending much. Let’s look at creative and affordable ideas that might already be within your reach or easy to find nearby.
Repurposing Household Items
Look around your home for items that can double as drawer organizers. Old plastic containers, ice cube trays, and even cardboard boxes cut to size can keep utensils separated and easy to find.
I once used an empty cutlery tray from a broken drawer organizer to sort my cooking tools. It saved me from buying a new one and worked perfectly until I found a better option.
Think about small containers like pill organizers or muffin tins. They fit nicely in drawers and help divide space efficiently. Could something in your recycling bin be the next perfect organizer?
Budget-friendly Store-bought Options
If you prefer ready-made solutions, many stores offer inexpensive organizers that fit most drawers. Look for plastic or bamboo trays at dollar stores or discount retailers.
These options often come in sets, letting you customize your drawer layout. Some stores even sell adjustable inserts that expand to fit different drawer sizes.
Don’t overlook online marketplaces where you can find affordable organizers with user reviews. Have you checked what’s available near you before spending a lot on specialized kitchen products?
Credit: www.youtube.com

Credit: www.familyhandyman.com
Frequently Asked Questions
What Materials Are Best For Inexpensive Utensil Organizers?
Affordable materials like cardboard, plastic trays, or wooden dividers work best. They are durable, easy to customize, and budget-friendly for organizing kitchen utensils effectively.
How Can I Customize A Drawer Organizer Cheaply?
Use recycled boxes or inexpensive trays and cut them to fit your drawer. Add labels or paint for a personalized, organized look without spending much.
How Do I Measure My Drawer For An Organizer?
Measure the drawer’s length, width, and depth precisely. This ensures your organizer fits well and maximizes space for all your kitchen utensils.
Can I Make A Drawer Organizer Without Tools?
Yes, use ready-made plastic trays or fold cardboard dividers. These options require minimal or no tools and still keep utensils neatly arranged.
Conclusion
Creating a cheap kitchen utensil drawer organizer saves space and money. You can use items found at home or dollar stores. This project helps keep your kitchen tidy and tools easy to find. It takes just a little time and effort.
Organizing your drawer makes cooking more fun and less stressful. Try this simple idea to improve your kitchen today. Small changes make a big difference in daily life. Give it a shot and enjoy a neat, organized kitchen.