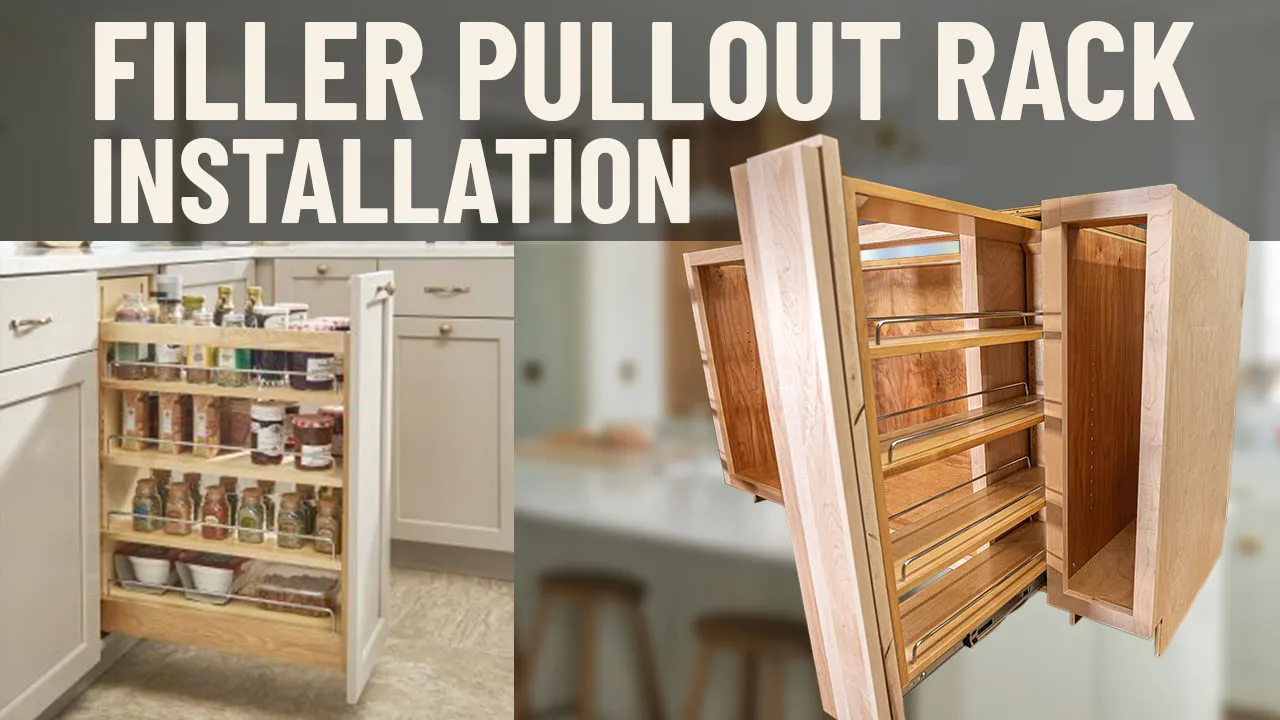
Is your sliding spice rack stuck, wobbly, or just not working like it used to? Removing it might seem tricky, but with the right steps, you can do it quickly and safely.
In this guide, you’ll learn exactly how to take out your sliding spice rack without damaging your cabinets or making a mess. Whether you want to replace it or just need more space, these simple tips will make the job easy.
Keep reading—you’ll be surprised how fast and stress-free this can be!
Tools Needed
Before you start removing your sliding spice rack, it’s important to gather the right tools. Having these handy will make the process smoother and help avoid any damage to your cabinetry or the rack itself. You might be surprised how a few simple tools can save you time and frustration.
Basic Hand Tools
Most sliding spice racks are secured with screws or clips, so a good screwdriver is essential. A Phillips head screwdriver covers the majority of screws you’ll encounter, but keep a flathead nearby just in case. Having a small set of screwdrivers allows you to switch quickly if needed.
Additionally, a pair of pliers can come in handy for gripping and gently pulling out stubborn parts. If the rack feels stuck, pliers give you better control without risking damage.
Measuring Tools
Measuring tape or a ruler helps you note the exact size of the spice rack before removal. This is useful if you plan to replace it with a similar one or need to order a new rack online.
Taking measurements early also prevents surprises later—like buying the wrong size or struggling with an ill-fitting replacement.
Safety Gear
Don’t overlook safety gear. Wearing gloves protects your hands from sharp edges and splinters. Safety glasses are a smart choice if you need to drill or pry parts loose, shielding your eyes from debris.
Keeping safety in mind ensures your project goes smoothly without unexpected trips to the emergency room.
Additional Helpful Tools
- Utility knife:Useful for cutting any caulk or adhesive holding the rack in place.
- Putty knife or flat pry bar:These tools can gently loosen glued or stuck components without damaging your cabinets.
- Flashlight:Helps you see screws or clips hidden in tight or dark spaces.
Do you have all these tools ready? Taking a moment to prepare will make removing your sliding spice rack less of a hassle and more of a satisfying DIY success.
Prepare The Area
Preparing the area before removing a sliding spice rack is essential for a smooth process. It helps avoid damage and keeps your kitchen organized. Taking time to set up the space makes the task safer and easier.
Clear Surrounding Items
Remove all items near the spice rack. This includes spices, jars, and kitchen tools. Clearing the area prevents accidents and gives you room to work. It also stops objects from falling or breaking during removal.
Protect Surfaces
Cover countertops and floors close to the rack. Use a soft cloth or a protective mat. This shields surfaces from scratches and dust. Protection helps keep your kitchen clean and damage-free.
Locate Mounting Points
Find the screws or clips holding the sliding spice rack in place. These mounting points are usually inside the cabinet or on the rack’s sides. Identifying them helps in safely removing the rack without damage.
To successfully remove a sliding spice rack, first locate the mounting points. These secure the rack to your cabinet. Identifying them is crucial for a smooth removal process. Most racks have screws, clips, or brackets. Each type needs a different approach for removal. Below, find simple steps to identify these mounting points.
Check For Screws
Screws are the most common mounting method. Use a flashlight to examine the rack. Look for screws along the sides or back. They may be hidden under the rack. Use a screwdriver to gently remove them. Be careful not to strip the screw heads.
Identify Clips Or Brackets
Some racks use clips or brackets instead of screws. These are usually found at the base or sides. Clips may snap into place, holding the rack securely. Brackets can be metal or plastic. Press or lift to release them. Ensure you handle them gently to avoid damage.

Credit: www.amazon.com
Remove Fasteners
Removing the fasteners is a key step in detaching your sliding spice rack without causing damage. These small components hold the rack firmly in place, so handling them carefully ensures a smooth removal process. Understanding how to work with screws and clips will save you time and prevent frustration.
Unscrew With Proper Tools
Before you start unscrewing, make sure you have the right tools on hand. A screwdriver matching the screw head—whether Phillips, flathead, or another type—makes the job easier and reduces the risk of stripping the screws.
Apply steady pressure as you turn the screws counterclockwise. If a screw feels stuck, try a bit of penetrating oil to loosen it, but avoid forcing it, which could damage the rack or wall.
Have you ever tried to remove a screw only to realize you grabbed the wrong screwdriver? It’s frustrating and can waste precious time. Taking a moment to check the screw type before you begin pays off.
Release Clips Safely
Some sliding spice racks use clips instead of or alongside screws. These clips snap the rack into place and need gentle handling to avoid breaking.
Use a flathead screwdriver or a putty knife to carefully pry the clips open. Work slowly and wiggle the tool slightly to ease the clip away without snapping it.
Think about how delicate these clips can be—rushing might leave you with a broken piece that’s hard to replace. Patience in this step means your spice rack can be reinstalled or moved without hassle.
Detach The Rack
Detaching your sliding spice rack is a straightforward task, but it requires care and attention to avoid damage. Before you start, make sure you have cleared all the spices and items from the rack. This will make the removal process smoother and safer for both the rack and your cabinets.
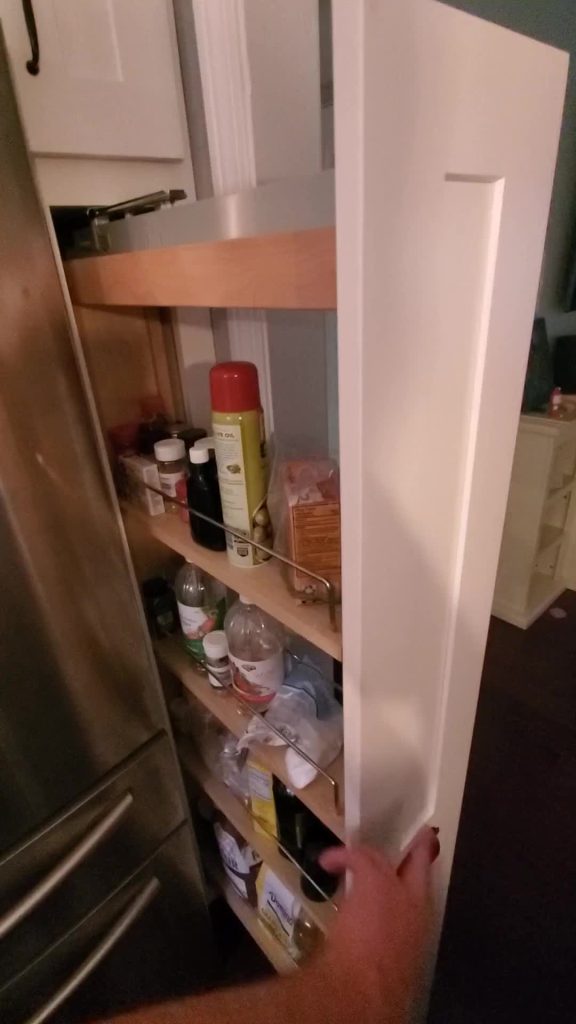
Slide Out Carefully
Begin by gently pulling the spice rack outward. Don’t rush this step. If you feel resistance, pause and check for any screws or clips still holding the rack in place.
Sliding it out slowly helps prevent the rack from getting stuck or causing damage to the cabinet’s interior. Have a clear path in front of you so the rack can come out without obstruction.
Handle With Care
Once the rack is free from its tracks, hold it firmly but gently. Some racks are heavy or have delicate components, so avoid gripping too hard or twisting it.
Think about where you’ll place the rack after removal. Having a soft surface nearby can protect the rack from scratches or dents. Do you have a spot ready to keep it safe while you work on your kitchen?
Credit: www.cabinetjoint.com
Inspect And Clean
Before you remove your sliding spice rack, it’s important to inspect and clean the area thoroughly. This step ensures that you don’t miss any hidden damage and that the mounting surface is ready for either reinstallation or a new setup. Taking a few moments here can save you frustration later.
Check For Damage
Look closely at the spice rack and the surrounding cabinet area for any signs of wear or damage. Are there cracks, loose screws, or warped wood? Even small issues can affect how the rack slides and holds weight.
Sometimes, damage isn’t obvious until you move the rack. Try sliding it gently back and forth. Does it catch or wiggle unusually? If so, note where the problem spots are. This helps you decide if repairs are needed before reinstalling or replacing the rack.
Clean Mounting Area
Once the rack is removed, clean the mounting area well. Dust, grease, and food particles often accumulate here, making the surface sticky or uneven. Use a mild cleaner and a soft cloth to wipe down every corner.
Pay extra attention to screw holes and tracks where the rack slid in and out. If debris is left behind, it could prevent a smooth fit later. Have you ever tried to reinstall something only to find it doesn’t sit right? A clean surface can prevent that hassle.
Tips For Reinstallation Or Replacement
Reinstalling or replacing a sliding spice rack can refresh your kitchen’s organization and style. It’s not just about fitting it back in place; the process requires attention to detail to ensure smooth operation and durability. You want your spice rack to slide effortlessly and hold your spices securely without any wobble or misalignment.
Check The Mounting Surface And Hardware
Before you start, inspect the surface where the spice rack will be mounted. Is it clean, flat, and sturdy enough to support the rack? Loose or uneven surfaces can cause the rack to tilt or come loose over time.
Also, take a close look at the screws, brackets, or tracks. Reusing old hardware might save time, but if anything looks worn or rusty, replacing them can prevent future headaches.
Measure Twice, Align Once
Accurate measurements make all the difference. Measure the space carefully to ensure the rack fits perfectly without scraping walls or cabinets.
Mark your drill points clearly to keep everything level. A slight misalignment can make the rack stick or slide unevenly, which gets frustrating fast.
Test The Sliding Mechanism Before Final Fixing
After loosely mounting the rack, slide it back and forth a few times. This helps you spot any rough spots or tight areas early on.
Adjust the positioning or hardware if needed before tightening everything down. It’s easier to fix alignment now than after full installation.
Consider Upgrading To Soft-close Or Smooth-glide Tracks
If your old rack felt jerky or noisy, you might want to upgrade the sliding tracks. Soft-close or smooth-glide tracks add a touch of luxury and prevent damage from slamming.
They’re simple to install and can make your spice rack feel like a brand-new feature in your kitchen.
Secure Loose Components And Avoid Overloading
Once installed, check for any loose parts and tighten them. A wobbly rack can lead to spills and frustration.
Think about how much weight your rack will hold. Overloading can strain the tracks and reduce the rack’s lifespan. Keeping it organized and light improves both usability and durability.
Have you ever struggled with a sliding rack that just wouldn’t glide smoothly? What small change made the biggest difference for you? Share your tips or questions below to help others get their spice racks sliding perfectly!

Credit: www.amazon.com
Frequently Asked Questions
How Do I Safely Remove A Sliding Spice Rack?
To safely remove a sliding spice rack, first clear all spices. Locate and unscrew the mounting screws or clips. Gently pull the rack out of its slot. Avoid forcing it to prevent damage to the cabinet or rack.
What Tools Are Needed To Remove A Sliding Spice Rack?
You typically need a screwdriver, either Phillips or flathead. A flashlight helps to see screws in dim spaces. Sometimes, a putty knife can assist in loosening glued or stuck racks. Always use tools gently to avoid damage.
Can I Remove A Sliding Spice Rack Without Damaging Cabinets?
Yes, removing a sliding spice rack carefully prevents damage. Always unscrew fasteners slowly and pull the rack evenly. Avoid using excessive force or sharp tools. Protect the cabinet surface by placing a cloth underneath.
How Do I Reinstall A Sliding Spice Rack After Removal?
To reinstall, align the rack with the mounting holes. Secure it with screws or clips you removed earlier. Test the sliding mechanism to ensure smooth operation. Tighten screws firmly, but avoid over-tightening to prevent damage.
Conclusion
Removing a sliding spice rack can be simple and quick. Follow the steps carefully to avoid damage. Use the right tools for safety and ease. Take your time and work slowly. After removal, clean the area well. You can replace or repair the rack as needed.
Enjoy your refreshed kitchen space. Small tasks like this bring big satisfaction. Keep your kitchen organized and neat.