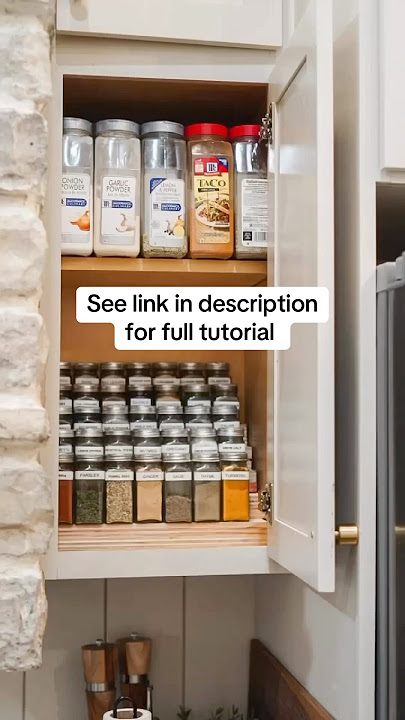
Are you tired of searching through messy cabinets for your spices? Imagine having all your favorite seasonings neatly organized and easy to reach every time you cook.
Making your own spice rack DIY is simpler than you think, and it can transform your kitchen instantly. In this guide, you’ll discover step-by-step how to create a stylish, functional spice rack that fits your space and style. Get ready to save time, reduce clutter, and add a personal touch to your kitchen with a project you’ll be proud of.
Keep reading, and let’s make your cooking experience smoother and more enjoyable!
Choosing The Right Materials
Choosing the right materials is key to building a sturdy and beautiful spice rack. The materials affect the rack’s durability and style. It also impacts how easy the project is to complete. Picking quality materials saves time and effort in the long run.
Consider the space where you will place the spice rack. Choose materials that match your kitchen decor. Think about how much weight the rack needs to hold. These factors help guide your material choices.
Selecting Wood Types
Wood is a popular choice for DIY spice racks. It looks warm and natural. Some woods are easier to work with than others. Pine is soft and affordable, great for beginners. Oak is hard and strong, perfect for a long-lasting rack. Cedar has a nice smell and resists moisture well.
Choose wood that fits your budget and skill level. Make sure the wood is smooth or easy to sand. Avoid wood with many knots or cracks. These can weaken the rack.
Essential Tools Needed
- Saw – for cutting wood to size
- Drill – to make holes for screws
- Screwdriver – to fasten parts together
- Measuring tape – for accurate dimensions
- Sandpaper – to smooth rough edges
- Clamps – to hold pieces while gluing or screwing
Having the right tools speeds up the building process. Use sharp blades and bits for clean cuts and holes.
Additional Supplies
- Wood glue – for extra strength
- Screws or nails – to secure pieces
- Wood finish or paint – to protect and beautify
- Brushes or cloth – for applying finish
- Protective gear – gloves and goggles for safety
Choose finishes that resist moisture and stains. This keeps your spice rack looking good over time.
Credit: www.tastingtable.com
Designing Your Spice Rack
Designing your spice rack is the most exciting part of the DIY process. This step lets you tailor the rack to fit your kitchen perfectly and match your style. Thoughtful design ensures your spices stay organized and easy to access every time you cook.
Measuring Your Space
Start by measuring the area where you plan to place your spice rack. Use a tape measure to get the width, height, and depth of the space. Don’t forget to check for any obstacles like switches or handles that could affect the rack’s placement.
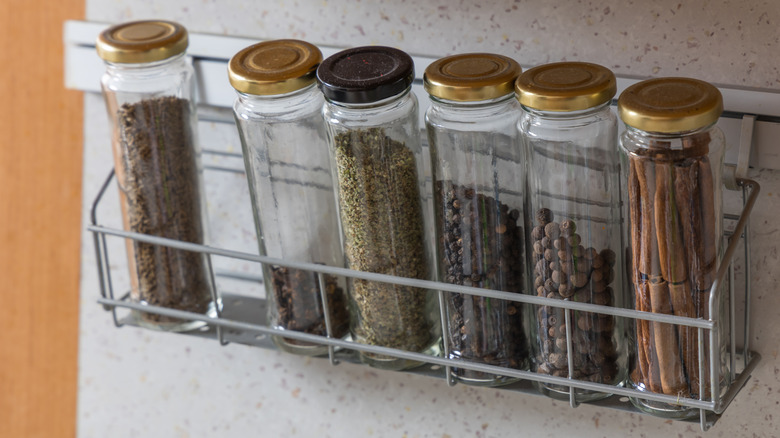
Consider if you want the rack mounted on a wall, inside a cabinet, or sitting on a countertop. Each spot will need slightly different measurements. Accurate measurements save you from surprises during installation and help avoid wasted materials.
Deciding On Rack Style
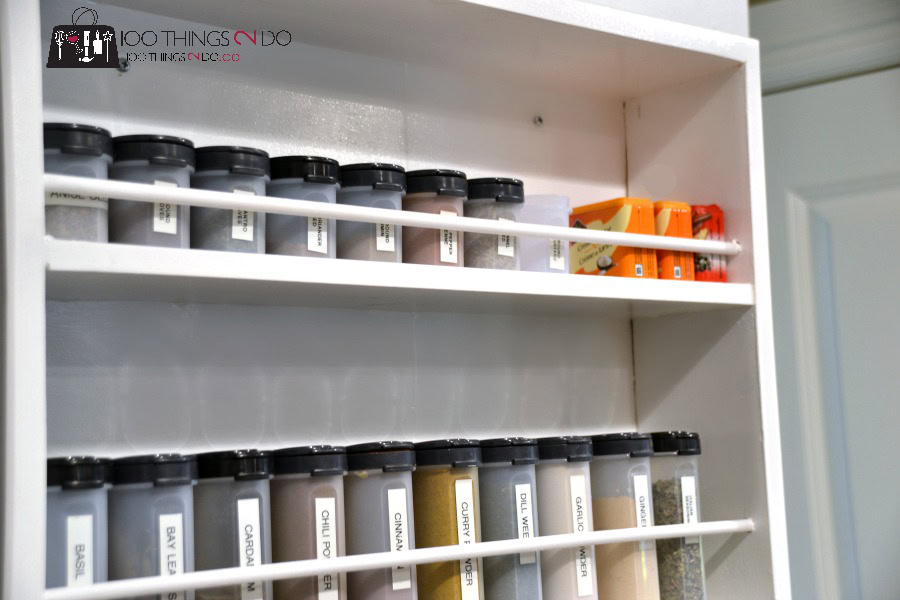
Think about how you want your spice rack to look and function. Do you prefer open shelves for quick access or enclosed compartments to keep dust out? Maybe a tiered design will let you see all your spice jars at a glance.
Also, decide if you want a traditional wooden look, a modern metal finish, or something colorful and fun. Your spice rack can add personality to your kitchen, so choose a style that fits your taste and cooking habits.
Planning Shelf Dimensions
Next, plan the size of each shelf based on the spice containers you use. Most spice jars are between 2 and 4 inches tall, but some specialty containers might be taller. Make sure the shelf height gives enough clearance for easy removal and replacement of jars.
Think about shelf depth too—too shallow, and jars might fall off; too deep, and you’ll waste space. A good rule is to add an inch or two beyond your tallest spice jar for comfort. Adjust shelf width so you can line up jars in a single row or double row depending on your collection size.
Cutting And Preparing Wood
Choose smooth, dry wood and measure pieces carefully for a perfect fit. Use a saw to cut wood into the right sizes. Sand each piece to remove rough edges before assembling your spice rack.
Cutting and preparing wood is a crucial step in your DIY spice rack project. It requires precision and care to ensure your spice rack not only looks great but also stands the test of time. With the right techniques and a bit of patience, you’ll be on your way to crafting a functional and stylish addition to your kitchen.
Marking Measurements
Begin by taking accurate measurements of your space. A measuring tape is your best friend here. Always double-check your dimensions to avoid any mistakes that could lead to wasted materials. Use a pencil to mark your measurements on the wood. This ensures clarity when it’s time to cut. Pencil marks can be easily erased or sanded off later. Consider using a carpenter’s square to make sure your lines are straight. A little extra effort here saves you from uneven cuts.
Safe Cutting Techniques
Safety first! Always wear protective eyewear and gloves. These protect you from sawdust and sharp edges. Choose the right saw for your project. A hand saw is great for smaller, more detailed cuts. For larger pieces, a circular saw offers speed and efficiency. Ensure your wood is securely clamped before cutting. This reduces movement and helps you achieve cleaner cuts. Don’t rush—steady and slow wins the race here.
Sanding For Smooth Finish
Once your pieces are cut, it’s time to sand. Sanding removes rough edges and gives your rack a polished look. Start with a coarse-grit sandpaper to smooth out major imperfections. Gradually move to a finer grit for a silky finish. Feel the wood with your hand; it should be smooth to the touch. This step not only improves appearance but also prevents splinters, ensuring a safe, user-friendly spice rack. Are you ready to transform your kitchen with a DIY spice rack? Taking these small but crucial steps in cutting and preparing wood will make all the difference in your project’s success.
Credit: blessherheartyall.com
Assembling The Rack
Assembling the spice rack is an important step to create a strong and neat organizer. Careful joining of all parts ensures the rack lasts long. This part focuses on connecting the pieces firmly, using the right tools, and checking the rack’s stability.
Joining Pieces Securely
Start by aligning the wood pieces properly. Each joint must fit tightly without gaps. Use clamps to hold parts in place if needed. Dry-fit the pieces before adding any nails or screws. This prevents mistakes and makes the structure solid.
Using Nails And Screws
Choose nails or screws based on the wood type and thickness. Screws offer better hold and are easier to remove if needed. Pre-drill holes to avoid splitting the wood. Drive screws or nails straight and flush with the surface for a clean look.
Ensuring Stability
Check the rack on a flat surface to ensure it stands evenly. Tighten any loose joints carefully. Add corner braces or wood glue for extra strength if needed. Test by applying gentle pressure to confirm the rack does not wobble.
Finishing Touches
Finishing touches can transform your DIY spice rack from simple to stunning. These final steps not only enhance the look but also improve durability and usability. Paying attention to details like paint, protection, and organization will make your spice rack truly stand out.
Painting Or Staining
Choosing the right color or stain can set the mood for your kitchen. Light colors can brighten the space, while darker stains add warmth and sophistication.
Try testing a small area first to see how the wood reacts. Remember, a smooth finish is easier to clean and looks more professional, so sand carefully before applying paint or stain.
Adding Protective Coating
Applying a protective coating guards your spice rack against spills and moisture. Clear polyurethane or varnish works well without hiding the wood’s natural beauty.
Make sure to apply thin, even layers and let each dry completely. This will help your spice rack last longer and keep it looking fresh even after frequent use.
Installing Hooks Or Labels
Hooks can add extra storage for small utensils or measuring spoons. They also make your spice rack more functional and organized.
Labels help you find spices quickly, especially if you have a large collection. You can use chalkboard stickers, printed tags, or even handwritten notes—choose what fits your style best.
Mounting And Organizing
Mounting and organizing your DIY spice rack creates a neat and accessible kitchen space. Proper mounting keeps the rack secure and saves counter space. Organizing the jars makes cooking faster and more enjoyable.
Wall Mounting Tips
Choose a sturdy wall near your cooking area for convenience. Use a level to keep the rack straight. Drill pilot holes to avoid splitting the wood. Use anchors if mounting on drywall for extra support. Secure screws tightly to hold the rack firmly.
Arranging Spice Jars
Group spices by type, such as herbs, seeds, and blends. Place frequently used spices at eye level for quick reach. Label each jar clearly for easy identification. Use uniform jars to save space and create a clean look. Arrange jars by color or size for visual appeal.
Maintaining Your Rack
Wipe the rack regularly to remove dust and spills. Check screws and anchors every few months to keep it secure. Replace empty spice jars promptly to avoid clutter. Keep spices away from heat and sunlight to preserve flavor. Rotate older spices to the front for use first.

Credit: www.facebook.com
Frequently Asked Questions
What Materials Do I Need For A Diy Spice Rack?
You need wood or repurposed crates, nails, screws, sandpaper, paint, and hooks. Choose materials based on your preferred style and size.
How Much Time Does Making A Spice Rack Take?
Building a basic spice rack usually takes 2 to 4 hours. Time varies depending on design complexity and drying time for paint or stain.
Can I Customize The Spice Rack Size?
Yes, you can customize the spice rack to fit your kitchen space. Measure available space before cutting materials for a perfect fit.
What Tools Are Essential For A Diy Spice Rack?
Essential tools include a saw, drill, screwdriver, hammer, measuring tape, and level. These help ensure accuracy and safety during construction.
Conclusion
Building your own spice rack saves space and keeps spices organized. It adds a personal touch to your kitchen decor. Plus, it helps you find spices quickly while cooking. This simple DIY project fits any kitchen style and budget. Try different designs to match your taste.
Enjoy fresh, easy-to-reach spices every day. A homemade spice rack makes cooking more fun and efficient. Give it a try and see the difference it brings.