
Are you tired of digging through cluttered kitchen cabinets to find your favorite spices? Imagine having all your spices neatly organized and easy to reach whenever you cook.
Building your own adjustable spice rack can make this a reality—and it’s simpler than you think. In this guide, you’ll learn step-by-step how to assemble an adjustable spice rack that fits perfectly in your kitchen and keeps your spices within arm’s reach.
By the end, you’ll enjoy a clutter-free space and faster meal prep. Ready to transform your spice storage? Let’s get started!
Choosing The Right Adjustable Spice Rack
Choosing the right adjustable spice rack can transform your kitchen experience. It’s not just about storage; it’s about making your cooking smoother and your space tidier. The right rack fits your needs perfectly, saving you time and frustration every time you reach for your favorite spice.
Types Of Adjustable Spice Racks
Adjustable spice racks come in various designs to suit different kitchen setups. Some racks expand horizontally or vertically, allowing you to customize the width or height based on your available space.
Other racks feature tiered shelves with adjustable spacing, which is great if your spice jars come in different sizes. Consider whether you want a countertop model, a wall-mounted rack, or one that fits inside your cabinet.
Ask yourself: where do you reach for spices most often? This will guide you in choosing a style that fits your cooking habits.
Materials And Durability
Spice racks are made from materials like wood, metal, and plastic, each with its pros and cons. Wooden racks offer a warm, classic look but may need more care to avoid stains and moisture damage.
Metal racks tend to be sturdy and long-lasting, often with powder-coated finishes that resist rust. Plastic racks are lightweight and easy to clean but might not hold up well over time if heavily loaded.
Think about your kitchen environment—does it get humid? Do you prefer something easy to move around or a permanent fixture? Your answers will help you pick the right material.
Size And Capacity Considerations
Before buying, measure the space where you plan to place your spice rack. An adjustable rack is only useful if it fits comfortably without crowding your kitchen.
Consider how many spice jars you want to store now and in the future. It’s better to have a bit of extra capacity than to outgrow your rack quickly.
Also, check the maximum weight the rack can hold, especially if you use heavy glass jars. Would you rather have a compact rack for essentials or a larger one for an extensive spice collection?
Tools And Materials Needed
Gathering the right tools and materials is the first step to building an adjustable spice rack. Having everything ready saves time and ensures smooth assembly. This section lists what you need to complete the project effectively.
Essential Tools
- Screwdriver (Phillips and flathead)
- Measuring tape or ruler
- Power drill with drill bits
- Level
- Hammer
- Pencil for marking
- Allen wrench (if included in kit)
Additional Supplies
- Wood glue for extra hold
- Sandpaper (medium grit)
- Wood screws or nails (check kit requirements)
- Protective finish or paint (optional)
- Cleaning cloth to wipe dust
Safety Precautions
- Wear safety goggles to protect eyes
- Use gloves to avoid splinters
- Work in a well-lit area
- Keep tools away from children
- Follow manufacturer instructions for power tools
Preparing Your Workspace
Clear a flat surface and gather all parts and tools before starting. Organize pieces to make assembly smooth and easy. Ensure good lighting to see small parts clearly.
Preparing your workspace is crucial for assembling an adjustable spice rack. A tidy and organized area makes the task easier and more enjoyable. Let’s explore some key steps to get your workspace ready for assembly.
Clearing And Cleaning The Area
Start by clearing your workspace of any clutter. Remove unnecessary items to create a spacious area. A clear space helps you focus on the task at hand. After clearing, clean the surface thoroughly. Wipe away dust and debris using a damp cloth. A clean area reduces the risk of losing small parts.
Organizing Parts And Tools
Lay out all the parts and tools needed for assembly. Place them in order of use to streamline the process. Check the instructions to ensure you have all required components. Arrange screws, brackets, and tools neatly. This organization saves time and minimizes frustration.
Setting Up A Comfortable Work Surface
Choose a flat and stable surface to work on. A sturdy table or countertop works well. Make sure there’s enough room to spread out parts and tools. Adjust your chair or stool for comfort. Good posture prevents strain during assembly.
Credit: www.homedepot.com
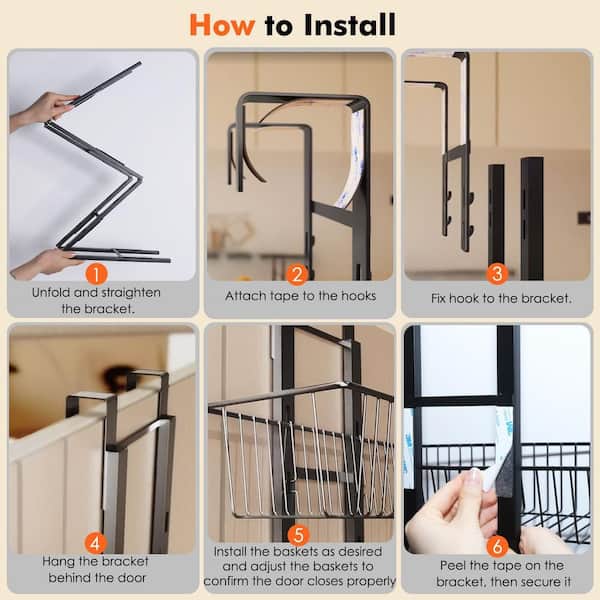
Step-by-step Assembly Guide
Building an adjustable spice rack can be simple with clear instructions. Follow this guide to assemble your rack quickly and correctly. Each step ensures stability and ease of use. Take your time and enjoy the process.
Identifying And Sorting Components
Start by unpacking all parts carefully. Lay them out on a flat surface. Separate screws, shelves, side panels, and support bars. Check the instruction manual to match each item. Group similar parts together for easy access.
Assembling The Frame
Connect the side panels with the base and top pieces. Use the provided screws and a screwdriver. Align holes properly before tightening screws. Make sure the frame stands firm and straight. Avoid over-tightening to prevent damage.
Adjusting The Shelves
Insert shelf supports into the desired height slots. Place each shelf carefully on the supports. Adjust shelves to fit spice jar sizes. Ensure shelves sit level and stable. Change shelf positions to customize storage space.
Securing The Rack
Double-check all screws for tightness. Attach any wall brackets if included. This adds safety and prevents tipping. Place the rack on a flat, stable surface. Test the rack by placing spices on shelves gently.
Mounting And Placement Tips
Mounting and placing your adjustable spice rack correctly can make a big difference in your kitchen’s functionality and safety. Careful thought about where and how you mount the rack helps you access spices quickly and keeps your kitchen organized. Let’s look at some tips to get this right.
Wall Mounting Vs Countertop Placement
Wall mounting saves precious counter space and keeps spices at eye level, making them easier to find while cooking. However, it requires drilling holes, so you need to be sure about the spot before you start.
Countertop placement offers flexibility—you can move the rack around as needed and avoid any wall damage. On the downside, it may take up valuable workspace and can get cluttered quickly.
Ask yourself: Do you want a permanent, space-saving solution, or something mobile and convenient?
Choosing The Ideal Location
Pick a spot near your cooking area but away from heat and moisture, as these can affect spice freshness. Near the stove or prep station is ideal for quick access, but avoid placing the rack right above the stove to prevent spills and heat damage.
Good lighting helps you easily read spice labels, so consider a well-lit corner or under-cabinet area. Think about your kitchen flow—does the location make grabbing spices feel natural or awkward?
Ensuring Stability And Safety
If you choose wall mounting, use appropriate anchors and screws for your wall type to keep the rack secure. Test the rack’s stability by gently pulling on it before loading spices.
For countertop racks, place non-slip pads underneath to prevent sliding, especially on smooth surfaces. Avoid overcrowding the rack—too many heavy jars can cause tipping or falls.
Have you ever experienced a spice rack falling down at the worst moment? Taking these precautions can save you from that mess and frustration.

Credit: www.amazon.com
Organizing Your Spices
Organizing your spices on an adjustable spice rack can transform your cooking experience. It saves time, reduces clutter, and ensures you always find the right seasoning at the right moment. Think about how often you’ve rummaged through a messy drawer—now imagine that frustration gone.
Labeling And Categorizing
Labeling your spice jars is a game-changer. Clear, consistent labels help you spot the spice you need without guessing. Use waterproof labels or a label maker for durability.
Group spices by type or usage to speed up your cooking process. For example, keep baking spices like cinnamon and nutmeg together, and separate savory herbs like oregano and thyme. This small step prevents mix-ups and streamlines your workflow.
Maximizing Space Efficiency
Adjust your spice rack shelves to fit different jar sizes and avoid wasted space. Taller bottles can go on one shelf while smaller containers fit snugly on another. This customization keeps your rack tidy and maximizes every inch.
Stacking jars or using tiered risers can also boost space without sacrificing access. Have you tried rotating racks or lazy Susans? They bring every spice within easy reach, even in tight kitchens.
Maintaining Freshness And Accessibility
Keep your spices fresh by storing them away from heat and direct sunlight. Your adjustable rack can be positioned in a cooler, darker spot in your kitchen to extend shelf life.
Accessibility means arranging spices by frequency of use. Place everyday essentials like salt, pepper, and garlic powder at eye level. When you do this, cooking flows faster and feels less like a chore.
Troubleshooting Common Issues
Troubleshooting common issues can save time and effort during assembly. Small problems like wobbly shelves or uneven surfaces can affect the rack’s stability. Fixing these issues ensures a sturdy and useful spice rack. This section covers easy fixes for typical assembly troubles.
Fixing Wobbly Shelves
Wobbly shelves cause instability and can lead to spills. Check if all screws are tight. Loose screws often cause wobbling. Use a screwdriver to tighten them firmly. If shelves still wobble, add small rubber pads under shelf corners. These pads improve grip and reduce movement.
Adjusting For Uneven Surfaces
Uneven surfaces make the rack tilt or shake. Place the rack on a flat surface first. Use shims or folded paper under the legs to balance it. Adjustable feet can help if your rack has them. Turn the feet clockwise or counterclockwise to level the rack. Ensure the rack does not rock after adjustment.
Replacing Missing Or Damaged Parts
Missing or broken parts stop assembly progress. Check the package carefully before starting. Contact the manufacturer for replacement parts if needed. Use matching screws and brackets if replacements are unavailable. Small parts stores often carry common hardware. Keep damaged parts aside for reference during replacement.
Maintaining Your Spice Rack
Maintaining your adjustable spice rack is key to keeping your kitchen organized and your spices fresh. Regular care makes sure the rack stays sturdy and looks good. It also helps you find your spices quickly and keeps your cooking space neat.
Regular Cleaning Tips
Dust and spills can build up on your spice rack. Clean it often to avoid sticky spots and stains.
- Use a soft cloth dampened with warm water to wipe shelves.
- Dry the rack completely to prevent moisture damage.
- Clean spice jars before placing them back.
- Avoid harsh chemicals that can damage the finish.
Periodic Adjustments
Adjust the shelves and compartments to fit new spice jars. This keeps your rack flexible and useful.
- Check screws and joints for tightness.
- Reposition shelves for easy access.
- Replace any worn or broken parts promptly.
Extending Rack Lifespan
Simple habits help your spice rack last longer.
- Keep the rack away from direct sunlight to avoid fading.
- Do not overload shelves beyond their weight limit.
- Handle the rack gently during cleaning and adjustments.
- Store the rack in a dry place to prevent rust or warping.

Credit: www.cliqstudios.com
Frequently Asked Questions
How Long Does It Take To Assemble An Adjustable Spice Rack?
Assembly usually takes 15 to 30 minutes depending on your experience. Clear instructions and all parts included can speed up the process. Having basic tools like a screwdriver ready is helpful.
What Tools Are Needed For Assembling A Spice Rack?
Typically, you need a screwdriver, hammer, and sometimes an Allen wrench. These tools help secure screws and tighten bolts efficiently. Most kits include necessary hardware but not always the tools.
Can I Customize The Size Of An Adjustable Spice Rack?
Yes, adjustable spice racks allow customization by changing shelf height or width. This flexibility fits different kitchen spaces and spice jar sizes perfectly. Always check the product manual for adjustment limits.
Is It Difficult To Assemble An Adjustable Spice Rack Alone?
No, most adjustable spice racks are designed for easy single-person assembly. Clear instructions and labeled parts simplify the process. However, having an extra hand can make it faster and easier.
Conclusion
Assembling an adjustable spice rack is simple and quick. Follow the steps carefully to avoid mistakes. Take your time with each part for the best fit. A well-built rack keeps your spices neat and easy to find. Enjoy the extra space and organized kitchen it provides.
This project suits anyone wanting a tidy cooking area. Try it yourself and see how useful it can be. A little effort leads to a big difference in your kitchen.