
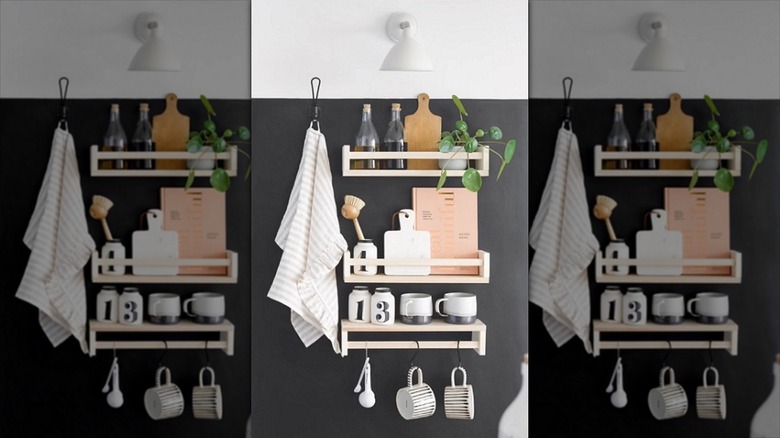
Are you ready to make your kitchen more organized and stylish? Hanging your Bekvam spice rack is a simple step that can transform your cooking space instantly.
Imagine having all your favorite spices within easy reach, neatly displayed, and freeing up valuable counter space. In this guide, you’ll discover easy-to-follow steps that anyone can do, even if you’re not a DIY expert. By the end, you’ll have a perfectly mounted spice rack that looks great and makes your cooking smoother.
Let’s get started and turn your kitchen into a clutter-free, inspiring place!
Choosing The Right Spot
Choosing the right spot for your Bekvam spice rack is key to making your kitchen more organized and efficient. It’s not just about finding an empty wall; it’s about picking a place that fits your cooking habits and kitchen flow. Taking a moment to think through the location can save you hassle later and keep your spices within easy reach.
Consider Kitchen Layout
Look at how your kitchen is set up. Is there a space near your stove or prep area where you frequently reach for spices? Placing the rack close to these spots makes cooking smoother.
Also, think about how much wall space you have around cabinets and appliances. You want the rack to be accessible but not in the way of daily activities.
Check Wall Material
Before drilling holes, check what kind of wall you have. Drywall, tile, or wood all require different anchors or screws.
Knowing your wall type helps you pick the right hardware so the rack stays firmly in place without damage.
Measure Available Space
Measure the height and width of the area you plan to use. The Bekvam spice rack isn’t very big, but you still need to ensure it fits comfortably without crowding.
Don’t forget to consider clearance for opening cabinet doors or moving around the kitchen. A tight spot can make using the rack frustrating.
Credit: www.housedigest.com
Gathering Tools And Materials
Before you start hanging your Bekvam spice rack, gathering the right tools and materials is crucial. Having everything ready saves time and prevents frustration during installation. It also helps you avoid multiple trips to the hardware store, keeping your project smooth and efficient.
List Of Required Tools
- Drill:Essential for making holes in the wall to mount the rack securely.
- Screwdriver:Needed to tighten screws; a Phillips head usually works best.
- Level:Ensures your spice rack hangs straight, avoiding uneven shelves.
- Measuring Tape:Helps you find the perfect height and spacing on your wall.
- Pencil:For marking drill points clearly on the wall.
- Wall Anchors and Screws:These provide stability, especially if you’re mounting on drywall.
These tools are common in most households, but if you don’t have them, borrowing from a friend can be a good option. Have you checked your toolbox recently? Sometimes, the right tool is closer than you think.
Safety Equipment
- Safety Glasses:Protect your eyes from dust and debris when drilling.
- Work Gloves:Keep your hands safe from sharp edges on screws or the rack itself.
- Dust Mask:Useful if you’re drilling into drywall or plaster to avoid inhaling dust.
Safety gear might feel like an extra step, but it’s worth it. During my first attempt at mounting a spice rack, I underestimated the dust and ended up coughing for days. Don’t let a small oversight spoil your project.
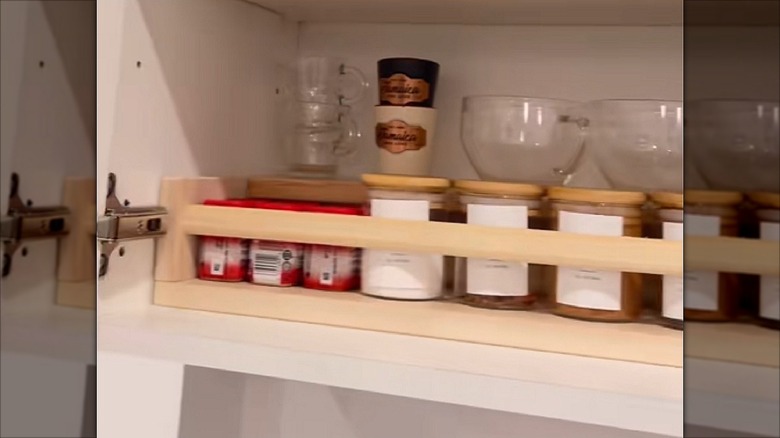
Preparing The Spice Rack
Choose a suitable wall space free from clutter for the Bekvam spice rack. Gather tools like a drill, screws, and a level to ensure proper installation. Mark the spots carefully to hang the rack straight and secure.
Preparing the spice rack for installation is a crucial step to ensure it serves its purpose efficiently and looks good on your wall. The Bekvam Spice Rack not only adds a touch of elegance to your kitchen but also offers practical storage solutions. Before you dive into hanging your new addition, it’s important to make sure it’s ready for the task.
Inspecting The Rack
Start by examining your Bekvam Spice Rack closely. Check for any visible defects or damages that might have occurred during shipping. Look out for cracks, uneven surfaces, or any loose parts that could affect its stability once mounted. Make sure all the required hardware is included in the package. Missing screws or brackets can delay your project, so it’s wise to double-check everything is in place before you begin. Have you ever gotten halfway through a project only to realize you’re missing a crucial piece? Avoid that frustration by being thorough now.
Cleaning Before Installation
Once you’re confident the rack is in good condition, give it a quick clean. A simple wipe with a damp cloth can remove dust or any residues from manufacturing. This small step ensures that your spices rest on a pristine surface. Consider applying a light coat of wood polish if you want your spice rack to have an extra shine. This can also protect the wood from moisture and spills. Remember, a little prep goes a long way in enhancing the longevity and appearance of your spice rack. By taking these initial steps, you set yourself up for a smoother installation process and a spice rack that not only functions well but looks great too. Are you ready to transform your kitchen space with this stylish organizer?

Credit: www.tastingtable.com
Marking Drill Points
Marking drill points is a crucial step when hanging your Bekvam spice rack. Accurate markings ensure the rack sits securely and straight on your wall. Missing this detail can lead to uneven installation or damage to your wall, which no one wants.
Use A Level For Accuracy
Before marking any drill points, grab a level. Hold the spice rack up against the wall at the height you want. Check if the rack’s top edge aligns perfectly with the bubble in the level.
If the bubble isn’t centered, adjust the rack slightly. This small step prevents a crooked spice rack that can spoil your kitchen’s look and cause spices to slide off. You want your spices organized, not your wall looking off-kilter.
Measure And Mark Holes
Next, measure the distance between the mounting holes on your Bekvam spice rack. Use a tape measure or ruler to get precise spacing. Mark these points on the wall with a pencil.
Double-check your measurements to avoid mistakes. You might want to use painter’s tape to create a straight line for your marks. This makes it easier to see and keeps your marks neat.
Have you ever drilled holes only to find they don’t line up? Taking the time to measure carefully saves you from that frustration. It’s the difference between a smooth installation and patching up extra holes later.
Drilling And Anchoring
Drilling and anchoring are key steps for securely hanging the Bekvam spice rack. Proper drilling ensures a stable hold on your wall. Anchors add extra support, especially on drywall or hollow surfaces. Taking time to choose the right tools and anchors prevents damage and keeps the rack steady.
Choosing The Right Drill Bit
Select a drill bit that matches your wall type and the anchor size. Use a masonry bit for brick or concrete walls. For drywall or wood, a standard twist bit works best. Check the anchor package for recommended drill bit size. A correct fit avoids loose holes or cracks.
Installing Wall Anchors
Mark the drill points on the wall using the rack’s mounting holes. Drill straight and clean holes at the marks. Insert wall anchors fully into the holes. Tap gently with a hammer if needed. Anchors keep screws from pulling out and add strength. Finally, screw the Bekvam spice rack into the anchors securely.
Credit: www.housedigest.com
Mounting The Bekvam Rack
Mounting the Bekvam spice rack is simple and quick. Proper installation keeps your spices organized and easy to reach. Follow clear steps for a stable and neat setup. Use basic tools and take your time to align the rack perfectly.
Aligning The Rack
Start by choosing the right place on your wall or cabinet. Hold the Bekvam rack against the surface. Use a level tool to make sure it is straight. Mark the spots for the screws through the holes on the rack. Double-check the marks before drilling.
Securing With Screws
Drill small pilot holes where you marked. This helps prevent the wood from splitting. Place the rack back and align the holes with the pilot holes. Use screws that fit the holes provided with the rack. Tighten the screws carefully to avoid damage. Check the rack is firm and does not wobble.
Final Adjustments
After hanging your Bekvam spice rack, final adjustments make all the difference in both safety and usability. These last steps ensure your rack stays secure and your spices are easy to access. Taking a few extra minutes now will save frustration later.
Checking Stability
Once the rack is mounted, gently shake it to test its sturdiness. Does it feel firmly attached, or is there any wobble? If you notice movement, double-check the screws and anchors to make sure they’re tight and properly fixed.
Also, consider the wall type you’re mounting on. Drywall may need stronger anchors compared to wood. If the rack feels unstable, adding heavier-duty anchors can prevent accidents.
Organizing Spices
With the rack secure, it’s time to arrange your spices. Group them by frequency of use—place your most-used spices at eye level for quick reach. Less-used or specialty spices can go on the top or bottom shelves.
You might want to label your jars or use uniform containers to make the rack look tidy and help you find spices faster. Have you thought about arranging spices by cuisine type, like Italian herbs on one shelf and baking spices on another? This little trick can speed up your cooking process and make your kitchen more enjoyable.
Troubleshooting Common Issues
Installing your Bekvam spice rack might seem straightforward, but some common issues can pop up during the process. These hiccups can be frustrating, especially if you’re eager to organize your spices quickly. Understanding how to handle these challenges will save you time and keep your rack securely in place.
Dealing With Uneven Walls
Uneven walls can cause your spice rack to wobble or not sit flush. Before drilling, check your wall surface with a level or by placing the rack against it. If you notice gaps, use wall anchors or shims to create a stable mounting surface.
One practical tip is to use small pieces of cardboard or folded paper as shims behind the rack’s mounting points. This adjustment can prevent rocking without damaging your wall.
Have you ever thought about how many walls aren’t perfectly flat? Taking a moment to assess this can make all the difference in a secure hang.
Handling Loose Screws
Loose screws can cause your spice rack to feel unstable and unsafe. If you find screws loosening over time, try using wall anchors designed for your wall type to increase grip.
Another trick is to apply a small dab of clear nail polish or thread locker to the screw threads before tightening. This helps keep screws from backing out due to vibrations or weight shifts.
Check your screws periodically, especially if you frequently add or remove items from the rack. A quick tighten can prevent bigger problems later on.
Frequently Asked Questions
How Do I Mount A Bekvam Spice Rack?
To mount a Bekvam spice rack, locate studs or use anchors. Mark holes, drill pilot holes, then screw the rack securely to the wall or cabinet. Ensure it is level and stable before placing spices.
What Tools Are Needed To Hang Bekvam Spice Rack?
You need a drill, screwdriver, level, measuring tape, pencil, and wall anchors or screws. These tools help ensure accurate and secure installation of the spice rack.
Can I Install Bekvam Spice Rack On Drywall?
Yes, you can install it on drywall using appropriate wall anchors. Choose anchors that support the rack’s weight and ensure a firm hold to avoid damage.
How High Should I Hang The Bekvam Spice Rack?
Hang it at eye level or within easy reach while cooking. This placement ensures quick access and keeps your spices organized and visible.
Conclusion
Hanging your Bekvam spice rack saves space and organizes your kitchen. Follow each step carefully for a secure fit. Use the right tools to avoid mistakes or damage. Place the rack where you can reach spices easily. Enjoy a neat kitchen and quick access while cooking.
Small effort, big difference in your cooking routine. Try it today and see how simple it feels.