
Are you tired of digging through cluttered cabinets to find your favorite spices? Imagine having all your spices neatly organized and right at your fingertips.
Building your own spice rack is easier than you think, and it can transform your cooking experience. In this guide, you’ll discover simple steps to create a stylish and practical spice rack that fits your kitchen perfectly. Keep reading, and you’ll soon enjoy a more organized, efficient, and enjoyable cooking space.

Credit: www.facebook.com
Choosing The Right Materials
Choosing the right materials for your spice rack is key to making it last long and look great. The materials affect the rack’s strength, style, and ease of building. Picking the best wood type and tools can save time and effort. Focus on materials that are sturdy and easy to work with for a smooth project.
Wood Types For Durability
Hardwoods are strong and resist wear well. Oak, maple, and cherry are popular choices. These woods hold screws tightly and do not dent easily. Softwoods like pine are cheaper and easier to cut but may scratch faster. For a natural look, consider bamboo. It is eco-friendly and very sturdy. Choose wood with a smooth surface to avoid splinters.
Essential Tools Needed
Having the right tools makes building faster and safer. A saw is necessary to cut wood pieces accurately. Use a drill to make holes for screws or nails. Sandpaper smooths rough edges and prepares surfaces for finishing. A measuring tape ensures pieces fit perfectly. Clamps hold wood steady while you work. Finally, wood glue adds extra strength to joints.
Designing Your Spice Rack
Designing your spice rack is an important step before building. It helps to plan how it will fit your kitchen space and how many spices it will hold. A well-designed rack keeps spices organized and easy to reach. Careful design saves time and frustration while cooking.
Determining Size And Capacity
Think about the number of spice jars you currently own. Leave space for new spices you may buy later. Measure the height and width of your jars to find the right shelf size. Consider the available wall or countertop space in your kitchen. A compact rack fits small spaces but holds fewer jars. A larger rack stores more spices but needs more room.
Layout Ideas For Accessibility
Arrange spices so labels face forward for quick identification. Use tiered shelves to see all jars at once. Consider a rotating spice rack for easy access from any angle. Group spices by type or frequency of use. Place everyday spices at eye level or within easy reach. Avoid deep shelves that hide jars behind others.
Preparing The Workspace
Clear your workspace and gather all necessary tools and materials before starting. Ensure the area is clean and well-lit for easy assembly. Organizing everything first helps the building process go smoothly.
Preparing the workspace is crucial when building a spice rack. A well-organized area helps avoid mistakes and ensures safety. This section guides you through setting up an efficient workspace.
Setting Up A Safe Area
Start by choosing a clean, well-lit spot. Ensure the space is free from clutter. This reduces the risk of accidents and makes finding tools easier. Use a sturdy table or workbench. It should be at a comfortable height to prevent strain.
Gathering Supplies
Collect all necessary tools and materials before starting. This saves time and reduces interruptions. Common supplies include:
- Wood pieces
- Screws and nails
- Hammer
- Screwdriver
- Measuring tape
- Sandpaper
- Wood glue
Having everything within reach keeps the process smooth and efficient.
Cutting And Assembling Parts
Cutting and assembling parts is a key phase in building your spice rack. Precise cuts and strong joins ensure a sturdy, neat rack. Taking time here helps avoid mistakes later. Follow clear steps for measuring, cutting, and joining wood pieces. Tools like saws, clamps, and drills make this easier. Safety matters—wear goggles and gloves to protect yourself.
Measuring And Marking
Start by measuring the wood carefully. Use a tape measure or ruler for accuracy. Mark the cut lines with a pencil. Double-check every measurement before cutting. Mark all pieces clearly, including shelves, sides, and back. Use a square to keep lines straight. Precise marks guide smooth, clean cuts. This step prevents wasted wood and uneven parts.
Joining Techniques
Choose joining methods based on your tools and skills. Common techniques include:
- Wood glue for quick, strong bonds
- Wood screws for extra hold and durability
- Dowels to align and strengthen joints
- Nails for simple, fast assembly
- Brackets for added support on corners
Clamp parts while glue dries for firm bonds. Drill pilot holes before screws to avoid wood splitting. Align parts carefully before fastening. Test fit pieces before final assembly. Clean excess glue with a damp cloth. Proper joining keeps your spice rack solid and reliable.
Finishing Touches
Finishing touches give your spice rack a polished, professional look. These final steps improve both appearance and durability. Smooth edges make the rack safe and pleasant to use. Applying paint or stain protects the wood and enhances its beauty. Pay attention to these details for a lasting, attractive spice rack.
Sanding And Smoothing Edges
Start by sanding all surfaces with fine-grit sandpaper. Focus on corners and edges to remove splinters. Smooth edges prevent scratches and provide a clean finish. Use a sanding block for flat areas and sandpaper sheets for curves. After sanding, wipe the dust off with a damp cloth. This prepares the wood for painting or staining.
Applying Paint Or Stain
Choose paint or stain based on the look you want. Paint offers bright colors and full coverage. Stain shows the natural wood grain and adds warmth. Use a brush or cloth to apply paint or stain evenly. Apply thin coats and let each dry fully before the next. Add a clear sealant for extra protection if desired.
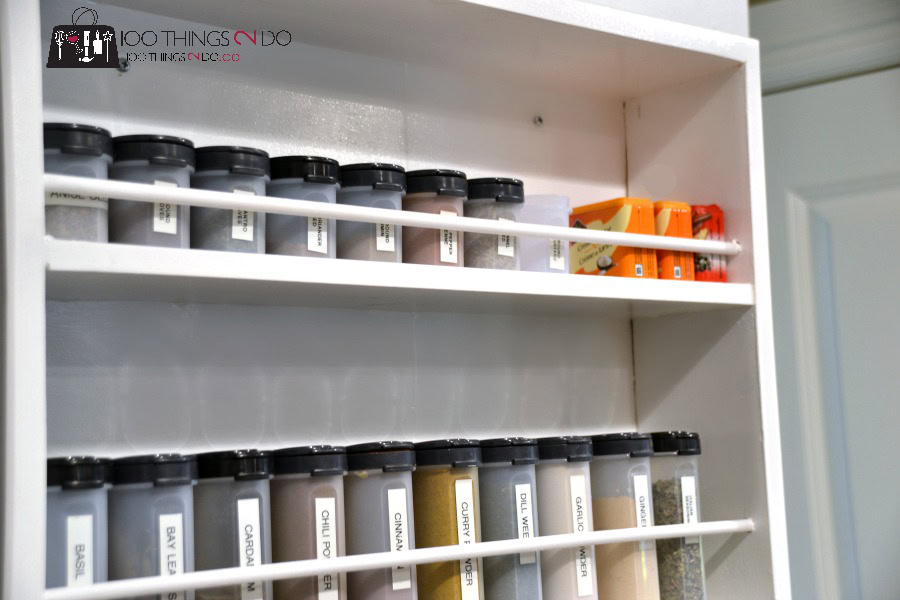
Credit: blessherheartyall.com
Mounting And Organizing
Mounting and organizing your spice rack properly makes cooking easier. A well-mounted rack saves space and keeps spices within reach. Organizing spices clearly helps find flavors quickly. This section covers smart mounting tips and efficient arranging ideas for your spice rack.
Wall Mounting Tips
Choose a sturdy wall near your cooking area. Use a level to keep the rack straight. Mark holes carefully before drilling. Use anchors for drywall to support the weight. Mount the rack at eye level for easy access. Leave enough space around for opening jars. Avoid placing the rack near heat or steam.
Arranging Spices Efficiently
Group spices by type or use for quick finding. Label jars clearly on top or front. Use uniform containers for a neat look. Arrange frequently used spices in front or center. Sort spices by color or size for visual appeal. Keep similar flavors close to each other. Refill jars regularly to avoid running out.
Maintenance And Upkeep
Keeping your spice rack in good shape ensures it lasts a long time and looks great. Proper maintenance keeps the wood fresh and free from dust. Regular care also prevents damage from spills or moisture.
Simple routines protect your investment and keep your spices easy to find and use. Clean and well-maintained racks add charm to any kitchen space.
Cleaning Your Spice Rack
Dust your spice rack often using a soft cloth or duster. Wipe down shelves with a damp cloth to remove sticky residues. Avoid harsh chemicals that can damage the wood or finish.
For stubborn spots, use mild soap mixed with water. Dry the rack completely after cleaning to prevent moisture buildup. Check corners and edges for dust or spills and clean gently.
Refreshing The Finish
Over time, the finish on your spice rack may fade or chip. Light sanding can smooth rough areas before applying new finish. Use a finish that matches the original, such as oil, wax, or varnish.
Apply the finish in thin coats with a brush or cloth. Let each coat dry fully before adding another. This keeps the wood protected and enhances its natural beauty.
Refresh the finish every few months or as needed. This simple care step extends the life of your spice rack and keeps it looking new.

Credit: borderjustfoods.com.au
Frequently Asked Questions
What Materials Do I Need To Build A Spice Rack?
To build a spice rack, you need wood, nails or screws, sandpaper, wood glue, and paint or stain. Basic tools like a saw, drill, and measuring tape are also essential. Choose materials based on your preferred size and style for durability and aesthetics.
How Do I Choose The Right Size For My Spice Rack?
Measure your available kitchen space and consider the number of spice jars you own. Ensure the rack fits comfortably without overcrowding. A well-sized rack improves accessibility and organization, making your cooking process smoother and more efficient.
Can I Customize The Design Of My Spice Rack?
Yes, you can customize your spice rack by adjusting dimensions, adding shelves, or including labels. Personalize it with paint colors or finishes to match your kitchen décor. Custom designs help optimize space and reflect your style.
How Do I Ensure My Spice Rack Is Sturdy?
Use quality wood and strong joinery methods like screws or wood glue. Sand edges for smoothness and apply a finish to protect the wood. Proper assembly and materials prevent wobbling and increase the rack’s lifespan.
Conclusion
Building a spice rack saves space and keeps spices organized. It makes cooking easier and more fun. You can choose the size and style you like. Use simple tools and materials for a quick project. Keep your spices fresh by storing them properly.
A homemade rack adds a personal touch to your kitchen. Try making one today and enjoy the benefits. Small changes can improve your cooking experience a lot. Ready to spice up your kitchen?