
Are you looking for a simple way to turn a tough chuck roast into a tender, flavorful meal without spending hours in the kitchen? Your electric pressure cooker is the secret weapon you need.
With just a few easy steps, you can have a juicy, melt-in-your-mouth roast ready in a fraction of the time. Keep reading, and you’ll discover how to make the most of your pressure cooker to impress your family and friends with a delicious home-cooked meal.

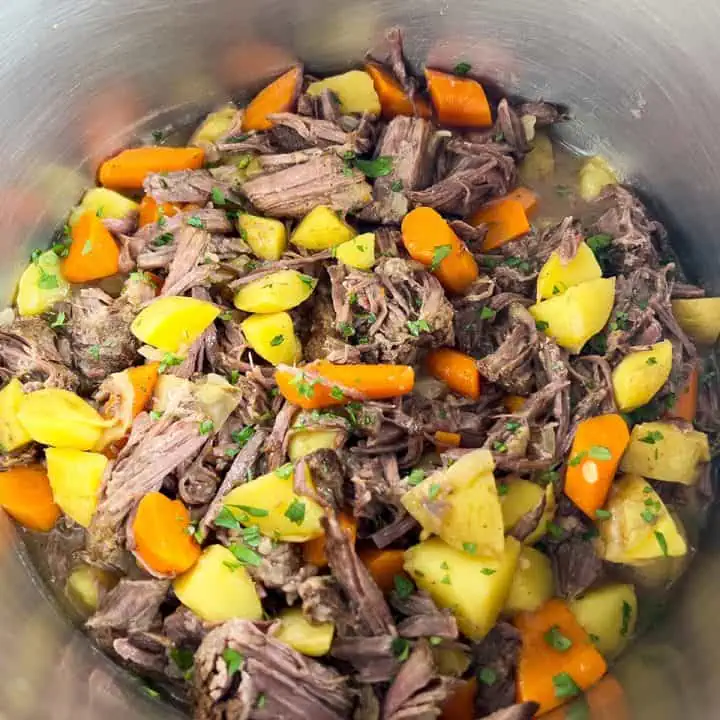
Credit: thefoodieeats.com
Choosing The Right Chuck Roast
Choosing the right chuck roast sets the foundation for a tender, flavorful meal in your electric pressure cooker. The quality and size of the meat you pick directly affect cooking time and the final taste. Let’s break down what to look for so you get the best results every time.
Selecting Quality Meat
Look for chuck roast with a bright red color and even marbling—those thin streaks of fat running through the meat. Marbling is key because it melts during cooking, keeping the roast juicy and tender. Avoid meat that looks dry or has dark spots, as it might not cook well or could taste off.
Have you ever noticed how some roasts turn out tough despite long cooking times? That usually means the meat quality was not right. Choosing a fresh, well-marbled cut can save you from that frustration and make your electric pressure cooker work its magic.
Size And Cut Considerations
Chuck roasts come in different sizes and shapes, usually between 2 to 5 pounds. Pick a size that fits comfortably inside your pressure cooker without forcing it. Overcrowding can prevent even cooking and affect tenderness.
Think about how many people you’re feeding. A 3-pound roast is perfect for 4 servings, while a larger one might be better for a family dinner or leftovers. Also, consider the thickness; a thinner roast cooks faster but might dry out if overcooked.
Do you prefer shredding your roast or slicing it into steaks? The cut you choose can influence the texture. Some cuts have more connective tissue, which breaks down beautifully under pressure, making shredding easier and more delicious.
Preparing The Chuck Roast
Preparing your chuck roast properly sets the stage for a tender, flavorful meal cooked in an electric pressure cooker. The way you handle the meat before cooking impacts both texture and taste. Taking a little extra time to trim and season can make a noticeable difference.
Trimming And Seasoning
Start by trimming excess fat from the chuck roast. Leaving too much fat can cause greasy flavors, but a thin layer helps keep the meat moist during cooking. Find a balance that works for your taste.
Next, season the roast generously. Use a simple mix of salt, pepper, garlic powder, and paprika for a classic flavor. Press the seasoning into the meat to help it stick better.
Have you ever tasted a roast that lacked depth? That’s often because it wasn’t seasoned properly before cooking. Don’t be shy with the seasoning—it’s your first chance to build flavor.
Searing For Flavor
Searing the chuck roast before pressure cooking is a game-changer. It creates a rich, brown crust that adds complexity to the final dish. Skip this step, and your roast might taste flat.
Heat a little oil in your pressure cooker’s sauté mode or a separate pan. Brown the meat on all sides, about 2-3 minutes per side, until you see a deep golden color. This locks in juices and boosts flavor.
Have you noticed how a beautifully seared roast smells even before it’s fully cooked? That aroma is a sign of flavor developing through the Maillard reaction. It’s worth the extra few minutes to get it right.
Setting Up The Electric Pressure Cooker
Place the electric pressure cooker on a flat, stable surface near an outlet. Ensure the lid is clean and fits securely before adding ingredients. Plug in the cooker and select the proper setting for cooking chuck roast.
Setting up your electric pressure cooker is a crucial step in achieving a perfectly cooked chuck roast. This handy kitchen appliance can significantly cut down cooking time and enhance flavors. However, understanding the settings and how to prepare your ingredients can make all the difference.
Choosing The Right Settings
Your electric pressure cooker comes with a variety of settings, but for chuck roast, you’ll typically want to use the “Meat/Stew” option. This setting is designed to handle the longer cooking times required for tougher cuts like chuck roast. If your cooker doesn’t have this specific setting, opt for a high-pressure setting. This will ensure the meat becomes tender and juicy. Always check the manual for specific guidance on your model.
Adding Liquid And Aromatics
Every pressure cooker needs liquid to function properly. For chuck roast, beef broth or stock is a great choice as it adds depth to the flavor. Generally, you should add at least one cup of liquid to start the pressure cooking process. To elevate your dish, consider adding aromatics like garlic, onions, and herbs. These ingredients infuse the meat with delicious flavors. Imagine your kitchen filled with the warm aroma of garlic and rosemary as your roast cooks to perfection. Do you have a favorite seasoning that your family loves? Don’t hesitate to experiment and make the recipe your own.
Cooking Times And Pressure Levels
Getting the cooking times and pressure levels right is essential to turning your chuck roast into a tender, flavorful meal using an electric pressure cooker. Too little time and the meat stays tough; too much, and it can dry out or lose its rich texture. Understanding how to balance these elements lets you customize the roast to your liking every time.
Recommended Cooking Duration
For a standard 3 to 4-pound chuck roast, set your electric pressure cooker to high pressure and cook for about 60 to 75 minutes. This range usually breaks down the tough connective tissue nicely without overcooking the meat.
If you prefer your roast to have a bit more bite and less shredding, aim for the lower end of the time spectrum. On the other hand, if you want it to fall-apart tender, lean toward the higher end. Have you ever noticed how even a 10-minute difference can change the texture dramatically?
Adjusting For Thickness And Preferences
Thickness matters more than weight when you adjust cooking times. Thicker roasts need extra minutes under pressure to cook evenly through the center.
| Thickness of Chuck Roast | Suggested Cooking Time at High Pressure |
|---|---|
| 1 to 1.5 inches | 50 to 60 minutes |
| 1.5 to 2.5 inches | 65 to 75 minutes |
| Over 2.5 inches | 80 to 90 minutes |
Don’t forget to factor in your personal preference for doneness. Would you like to shred the roast easily with a fork, or slice it thinly for sandwiches? Adjust the timing accordingly, and use the natural release method to keep juices locked in.
Releasing Pressure Safely
Releasing pressure safely after cooking your chuck roast in an electric pressure cooker is crucial. It ensures not only the perfect texture of your meat but also your safety in the kitchen. Understanding the differences between release methods helps you decide what’s best for your recipe and comfort level.
Natural Vs. Quick Release Methods
Natural release means letting the pressure drop on its own, without opening the valve. This can take 10 to 30 minutes depending on the amount of food inside. It helps the meat rest, keeping it tender and juicy—perfect for chuck roast.
Quick release, on the other hand, involves manually opening the pressure valve to let steam escape fast. This method is faster but can cause tough meat if done too soon. It’s great when you’re short on time but requires caution to avoid burns from hot steam.
Tips For Safety
- Use a long utensil:When doing quick release, use a long spoon or tongs to turn the valve. This keeps your hands away from the hot steam.
- Keep your face and hands clear:Stand back and avoid leaning over the cooker while releasing pressure.
- Check the pressure indicator:Never try to open the lid until the pressure indicator shows it’s safe.
- Have a towel handy:A kitchen towel can help shield your hand if you need to manually open the valve.
Have you ever rushed to open your pressure cooker and regretted it? Taking a moment to release pressure safely can save you from burns and keep your chuck roast delicious. What’s your go-to pressure release method?
Credit: thefoodieeats.com
Serving Suggestions
Serving a chuck roast cooked in an electric pressure cooker offers many tasty possibilities. Proper presentation and thoughtful pairings enhance the meal’s flavor and enjoyment. Simple steps ensure your roast shines on the dinner table.
Resting The Meat
Resting lets juices spread inside the roast. Cut the meat after 10 to 15 minutes of resting. Cover it loosely with foil to keep it warm. This step helps the roast stay tender and juicy.
Pairing With Sides And Sauces
Choose sides that balance the rich flavor of chuck roast. Classic options include:
- Mashed potatoes for creamy texture
- Steamed green beans for freshness
- Roasted carrots to add sweetness
- Buttered corn for a simple, sweet touch
Complement the roast with sauces like:
- Gravy made from pressure cooker drippings
- Horseradish sauce for a spicy kick
- Barbecue sauce for smoky flavor
These pairings create a balanced and satisfying meal.
Troubleshooting Common Issues
Troubleshooting common issues while cooking chuck roast in an electric pressure cooker can save you from a disappointing meal. Knowing how to adjust cooking times and techniques helps you achieve the perfect texture and flavor every time. Let’s look at how to fix two common problems: overcooked or dry meat and under-cooked or tough texture.
Overcooked Or Dry Meat
If your chuck roast ends up dry or falling apart too much, the cooking time was likely too long. Pressure cookers work fast, so even a few extra minutes can overcook the meat.
To prevent dryness:
- Reduce the cooking time by 5 to 10 minutes next time.
- Check the size of your roast; larger pieces need more time, smaller pieces less.
- Make sure there’s enough liquid in the cooker to create steam and keep the meat moist.
Have you noticed your roast drying out after a long pressure release? Try the quick release method instead to stop the cooking immediately.
Under-cooked Or Tough Texture
If the chuck roast is still tough or under-cooked, it needs more time under pressure to break down the connective tissue. Chuck is a tough cut that requires adequate cooking to become tender.
Here’s what you can do:
- Increase the pressure cooking time by 10 to 15 minutes.
- Allow a natural pressure release for at least 10 minutes before opening the lid.
- Make sure the meat is fully submerged in liquid to ensure even cooking.
Do you find your roast tough even after more cooking time? Try slicing it against the grain when serving; this simple step can make a big difference in tenderness.
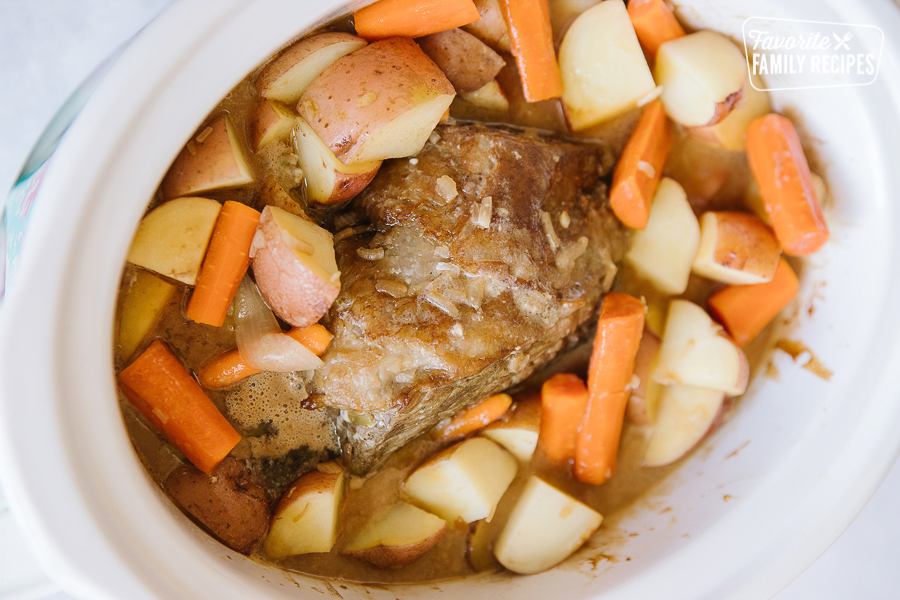
Credit: www.favfamilyrecipes.com
Frequently Asked Questions
How Long To Cook Chuck Roast In Electric Pressure Cooker?
Cook chuck roast for 60-70 minutes on high pressure. Let natural pressure release for 10-15 minutes. This ensures tender, juicy meat.
What Liquid Is Best For Pressure Cooking Chuck Roast?
Use beef broth, water, or a mix with red wine. Liquids prevent burning and create flavorful, moist roast.
Can I Cook Frozen Chuck Roast In Electric Pressure Cooker?
Yes, but increase cooking time by 10-15 minutes. Always check internal temperature for safety and tenderness.
How To Make Chuck Roast Tender In Pressure Cooker?
Cook at high pressure for recommended time and allow natural pressure release. This breaks down tough fibers for softness.
Conclusion
Cooking chuck roast in an electric pressure cooker saves time and effort. The meat turns tender and juicy with little work. Just add your favorite seasonings and liquid, then set the cooker. The pressure does the rest, making flavors rich and deep.
This method suits busy days and beginner cooks. Enjoy a warm, hearty meal without long waiting times. Try this simple way to cook chuck roast soon. You won’t regret the delicious results.