
Are you ready to add a stylish and practical touch to your space? Installing wooden wall shelves is a simple way to showcase your favorite items while keeping your room organized.
Whether you want to display books, plants, or décor, these shelves can transform any wall instantly. In this guide, you’ll discover easy steps that anyone can follow, even if you’ve never done a DIY project before. By the end, you’ll have sturdy, beautiful shelves that make your space truly yours.
Let’s get started and turn your walls into something special!
Choosing The Right Shelves
Choosing the right shelves can transform your space from cluttered to charming. The key lies in making decisions that fit both your room’s needs and your personal style. Think about what you want to store, how much weight the shelves will hold, and the vibe you want to create.
Selecting Wood Types
The type of wood you pick affects durability, look, and cost. Softwoods like pine are affordable and easy to work with but may dent easily. Hardwoods such as oak, maple, or walnut offer strength and a rich finish that lasts longer.
Consider whether you want a natural wood grain or a painted surface. You might want to test a small piece to see how it reacts to stains or finishes. Have you thought about reclaimed wood? It adds character and is eco-friendly.
Measuring Space Accurately
Measure twice, cut once is a good rule, but measuring carefully is the real challenge. Use a tape measure and note the width, height, and depth of the area where shelves will go. Don’t forget to check for obstacles like light switches or vents.
Think about how much space you need between shelves for the items you plan to store. Are you storing books, decor, or kitchen supplies? Each has different height and depth requirements. Measuring properly saves time and money later.
Picking Shelf Styles
Shelves come in various styles from floating to bracketed, each creating a different look. Floating shelves provide a clean, modern appearance but require strong wall anchors. Bracketed shelves offer a traditional feel and extra support for heavy items.
Do you want open shelves or something with sides to keep items secure? Consider the room’s style—minimalist, rustic, or industrial—to guide your choice. Your shelf style should not only look good but also fit your daily use and maintenance habits.
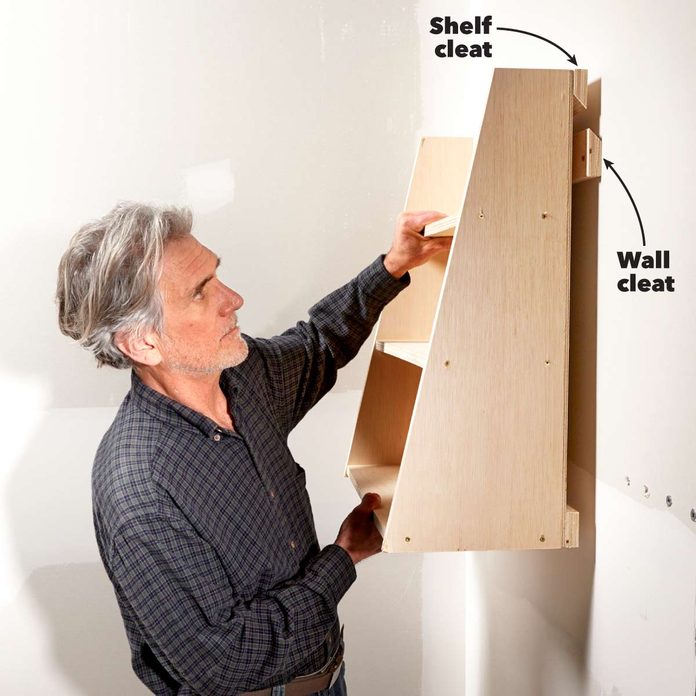
Credit: www.familyhandyman.com
Gathering Tools And Materials
Before you start installing wooden wall shelves, gathering the right tools and materials is crucial. Having everything ready saves time and prevents interruptions during the project. It also helps you avoid unnecessary trips to the store and ensures a smoother installation process.
Essential Tools List
- Drill:A cordless drill makes drilling holes and driving screws much easier.
- Level:Ensures your shelves sit perfectly straight on the wall.
- Stud Finder:Helps locate wall studs to securely anchor your shelves.
- Measuring Tape:Accurate measurements are key to proper placement and fitting.
- Screwdriver:Useful for tightening screws if you prefer manual control.
- Pencil:For marking drill points and shelf positions on the wall.
- Hammer:Sometimes needed for wall anchors or small adjustments.
Materials Needed
- Wooden Shelves:Choose the size and finish that fit your room’s style.
- Brackets:Select strong brackets that can support the weight of your shelves and items.
- Screws and Wall Anchors:Use appropriate screws and anchors based on your wall type.
- Wood Finish or Paint (Optional):Protect and enhance your shelves with a finish or color.
Safety Gear
- Safety Glasses:Protect your eyes from dust and debris during drilling.
- Work Gloves:Prevent splinters and improve grip on tools and materials.
- Dust Mask:Keeps you from inhaling sawdust or wall particles, especially when sanding or drilling.
Have you ever started a project only to realize halfway through that you’re missing a key tool? Gathering everything upfront not only saves you frustration but also keeps your momentum going. What’s one tool you think might surprise you with how much it helps during installation?
Preparing The Wall
Clean the wall surface thoroughly to remove dust and dirt. Use a level to mark where the shelves will go. Find wall studs to ensure strong support for the shelves.
Installing wooden wall shelves can enhance your room’s look and functionality. Before you start, preparing the wall is crucial. This ensures your shelves are sturdy and well-positioned. Follow these steps to get your wall ready.
Locating Wall Studs
Use a stud finder to locate wall studs. Studs provide strong support for your shelves. Move the stud finder slowly along the wall. It will beep or light up when it finds a stud. Mark the stud locations with a pencil.
Marking Shelf Positions
Decide where you want the shelves. Use a tape measure to ensure accurate placement. Mark the positions with a pencil. Keep the marks level using a spirit level. This prevents slanted shelves.
Checking For Obstacles
Ensure there are no hidden obstacles behind the wall. Use the stud finder to detect pipes and wires. Avoid these areas to prevent damage. Double-check your markings for safety.
Mounting The Brackets
Mounting the brackets is a crucial step in installing wooden wall shelves. This ensures your shelves stay secure and can hold the weight of your items safely. Paying close attention here prevents future problems like sagging or falling shelves.
Choosing Bracket Types
Not all brackets are created equal. You need to pick brackets that fit your shelf size and the weight it will carry. For lighter shelves, simple L-shaped brackets work well. For heavier loads, consider heavy-duty steel brackets or decorative wooden ones with extra support arms.
Think about the style, too. Do you want the brackets to be visible or hidden? Some brackets come with a sleek, minimal look, while others add a design element to your space. Choosing the right bracket type balances function and style.
Drilling Pilot Holes
Drilling pilot holes makes it easier to insert screws and prevents the wood from splitting. Use a drill bit slightly smaller than your screw diameter. Mark the bracket holes on your wall first, then drill carefully at those points.
Double-check your marks with a level to ensure the shelf will be straight. I learned this the hard way—once I skipped this step, and my shelf tilted noticeably. Taking your time here saves frustration later.
Securing Brackets Firmly
Use screws that are long enough to anchor into wall studs or solid anchors if you’re working with drywall. Tighten the screws until the bracket feels solid against the wall, but avoid over-tightening, which can damage the wall or bracket.
After securing each bracket, give it a firm wiggle to test stability. If it moves, it needs to be tightened or repositioned. Remember, strong brackets mean your shelves will stay put and your belongings will stay safe.
Installing The Shelves
Installing wooden wall shelves is a rewarding task that enhances any room. Proper installation ensures the shelves hold weight safely and look great. This section guides you through placing, leveling, and securing the shelves step-by-step.
Placing Shelves On Brackets
Start by gently setting the wooden shelf onto the mounted brackets. Make sure the shelf fits snugly and rests evenly across each bracket arm. Avoid forcing the shelf, as this can damage both wood and brackets. Check that the shelf sits flush against the wall for a clean look.
Leveling The Shelves
Use a spirit level to check if the shelf is perfectly horizontal. Place the level on top of the shelf in the center and at both ends. Adjust the shelf by shifting it slightly on the brackets until the bubble is centered. Level shelves prevent items from sliding off and look professional.
Securing Shelves In Place
Secure the shelf to the brackets to prevent movement. Use screws or brackets designed for your shelf type. Drill pilot holes carefully, then fasten screws without overtightening. Confirm the shelf is stable by applying gentle pressure. Proper securing keeps your shelf safe and durable.

Credit: www.youtube.com
Finishing Touches
Finishing touches are what transform your wooden wall shelves from a simple project to a polished piece of decor. These final steps enhance durability and style, making your shelves truly stand out. Let’s look at how sanding, staining or painting, and decorating can elevate your work.
Sanding And Smoothing
Start by sanding the shelves thoroughly to remove rough edges and splinters. Use fine-grit sandpaper and move along the grain for a smooth finish. This step not only improves the look but also makes the shelves safer to handle.
Pay special attention to corners and edges where roughness is most noticeable. You might find that even after installation, a quick sanding pass can fix minor imperfections. Have you noticed how a little extra effort here can make the difference between a DIY job and a professional finish?
Applying Stain Or Paint
Choose a stain or paint that matches your room’s style and the wood type. Stains highlight the wood grain and add warmth, while paint offers a chance to add color and personality. Apply thin, even coats to avoid drips and uneven patches.
Don’t forget to let each coat dry completely before applying the next. Use a brush or cloth suited for your product, and test colors on a scrap piece first if possible. How will your choice of color influence the overall vibe of your space?
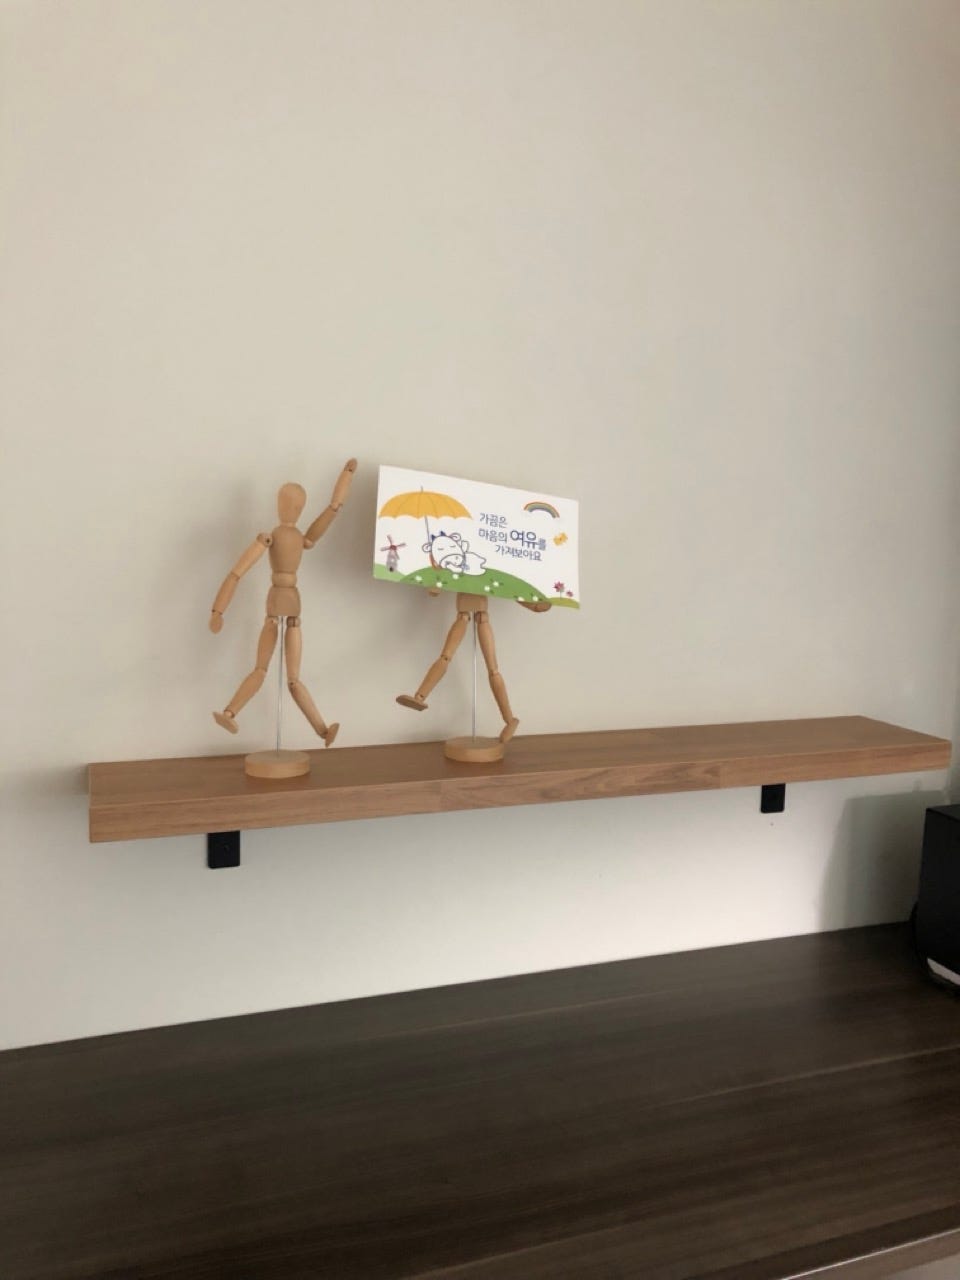
Decorating Ideas
Once your shelves are ready, think about how you want to style them. Mixing books, plants, and small decorative items can create a balanced and inviting look. Group items in odd numbers for a natural, eye-catching arrangement.
- Add a small potted plant for a touch of greenery and freshness.
- Use framed photos or artwork to personalize the space.
- Include decorative objects like candles or figurines to add texture.
Try changing the display seasonally to keep your shelves interesting. What items do you own that could bring your shelves to life?
Maintenance Tips
Maintaining wooden wall shelves keeps them looking fresh and strong. Simple care helps avoid damage and extends shelf life. Regular upkeep ensures your shelves stay safe and attractive.
Cleaning Wooden Shelves
Dust shelves often with a soft cloth. Use a damp cloth for sticky spots. Avoid soaking wood with water. Mild soap mixed with water works well for cleaning. Dry shelves immediately after wiping.
Preventing Damage
Keep shelves away from direct sunlight to stop fading. Avoid placing heavy items that cause bending or cracks. Use coasters under plants or wet objects to prevent water rings. Handle shelves gently during cleaning or moving.
Periodic Checks
Inspect shelves for loose screws or brackets regularly. Tighten hardware if needed. Look for signs of wood splitting or warping. Fix small issues quickly to prevent bigger problems. Check weight limits and adjust shelf contents accordingly.
Credit: medium.com
Frequently Asked Questions
What Tools Are Needed To Install Wooden Wall Shelves?
You need a drill, screws, wall anchors, a level, measuring tape, and a stud finder. These tools ensure secure and accurate installation.
How To Find Studs For Wooden Wall Shelf Installation?
Use a stud finder to locate studs behind the wall. Mark these spots for strong shelf support and stability.
What Type Of Wood Is Best For Wall Shelves?
Choose hardwoods like oak or maple for durability. Softwoods like pine work but may wear faster.
How High Should Wooden Wall Shelves Be Installed?
Install shelves at eye level or slightly above, around 60-72 inches from the floor, for easy access and display.
Conclusion
Wooden wall shelves add style and storage to any room. Follow steps carefully to ensure a strong and safe installation. Use the right tools and anchors for your wall type. Take your time measuring and leveling the shelves. Enjoy your new space for books, plants, or decorations.
Simple projects like this improve your home and skills. Keep your shelves clean and check them often. Small efforts bring big changes in home organization. Start today and see how shelves can brighten your space.